14個文本轉圖像AI API
2. 創(chuàng)建 API 成功后訪問 http://127.0.0.1:9080/anything/test 時,由于未進行登錄,因此將被引導到 Keycloak 的登錄頁面:
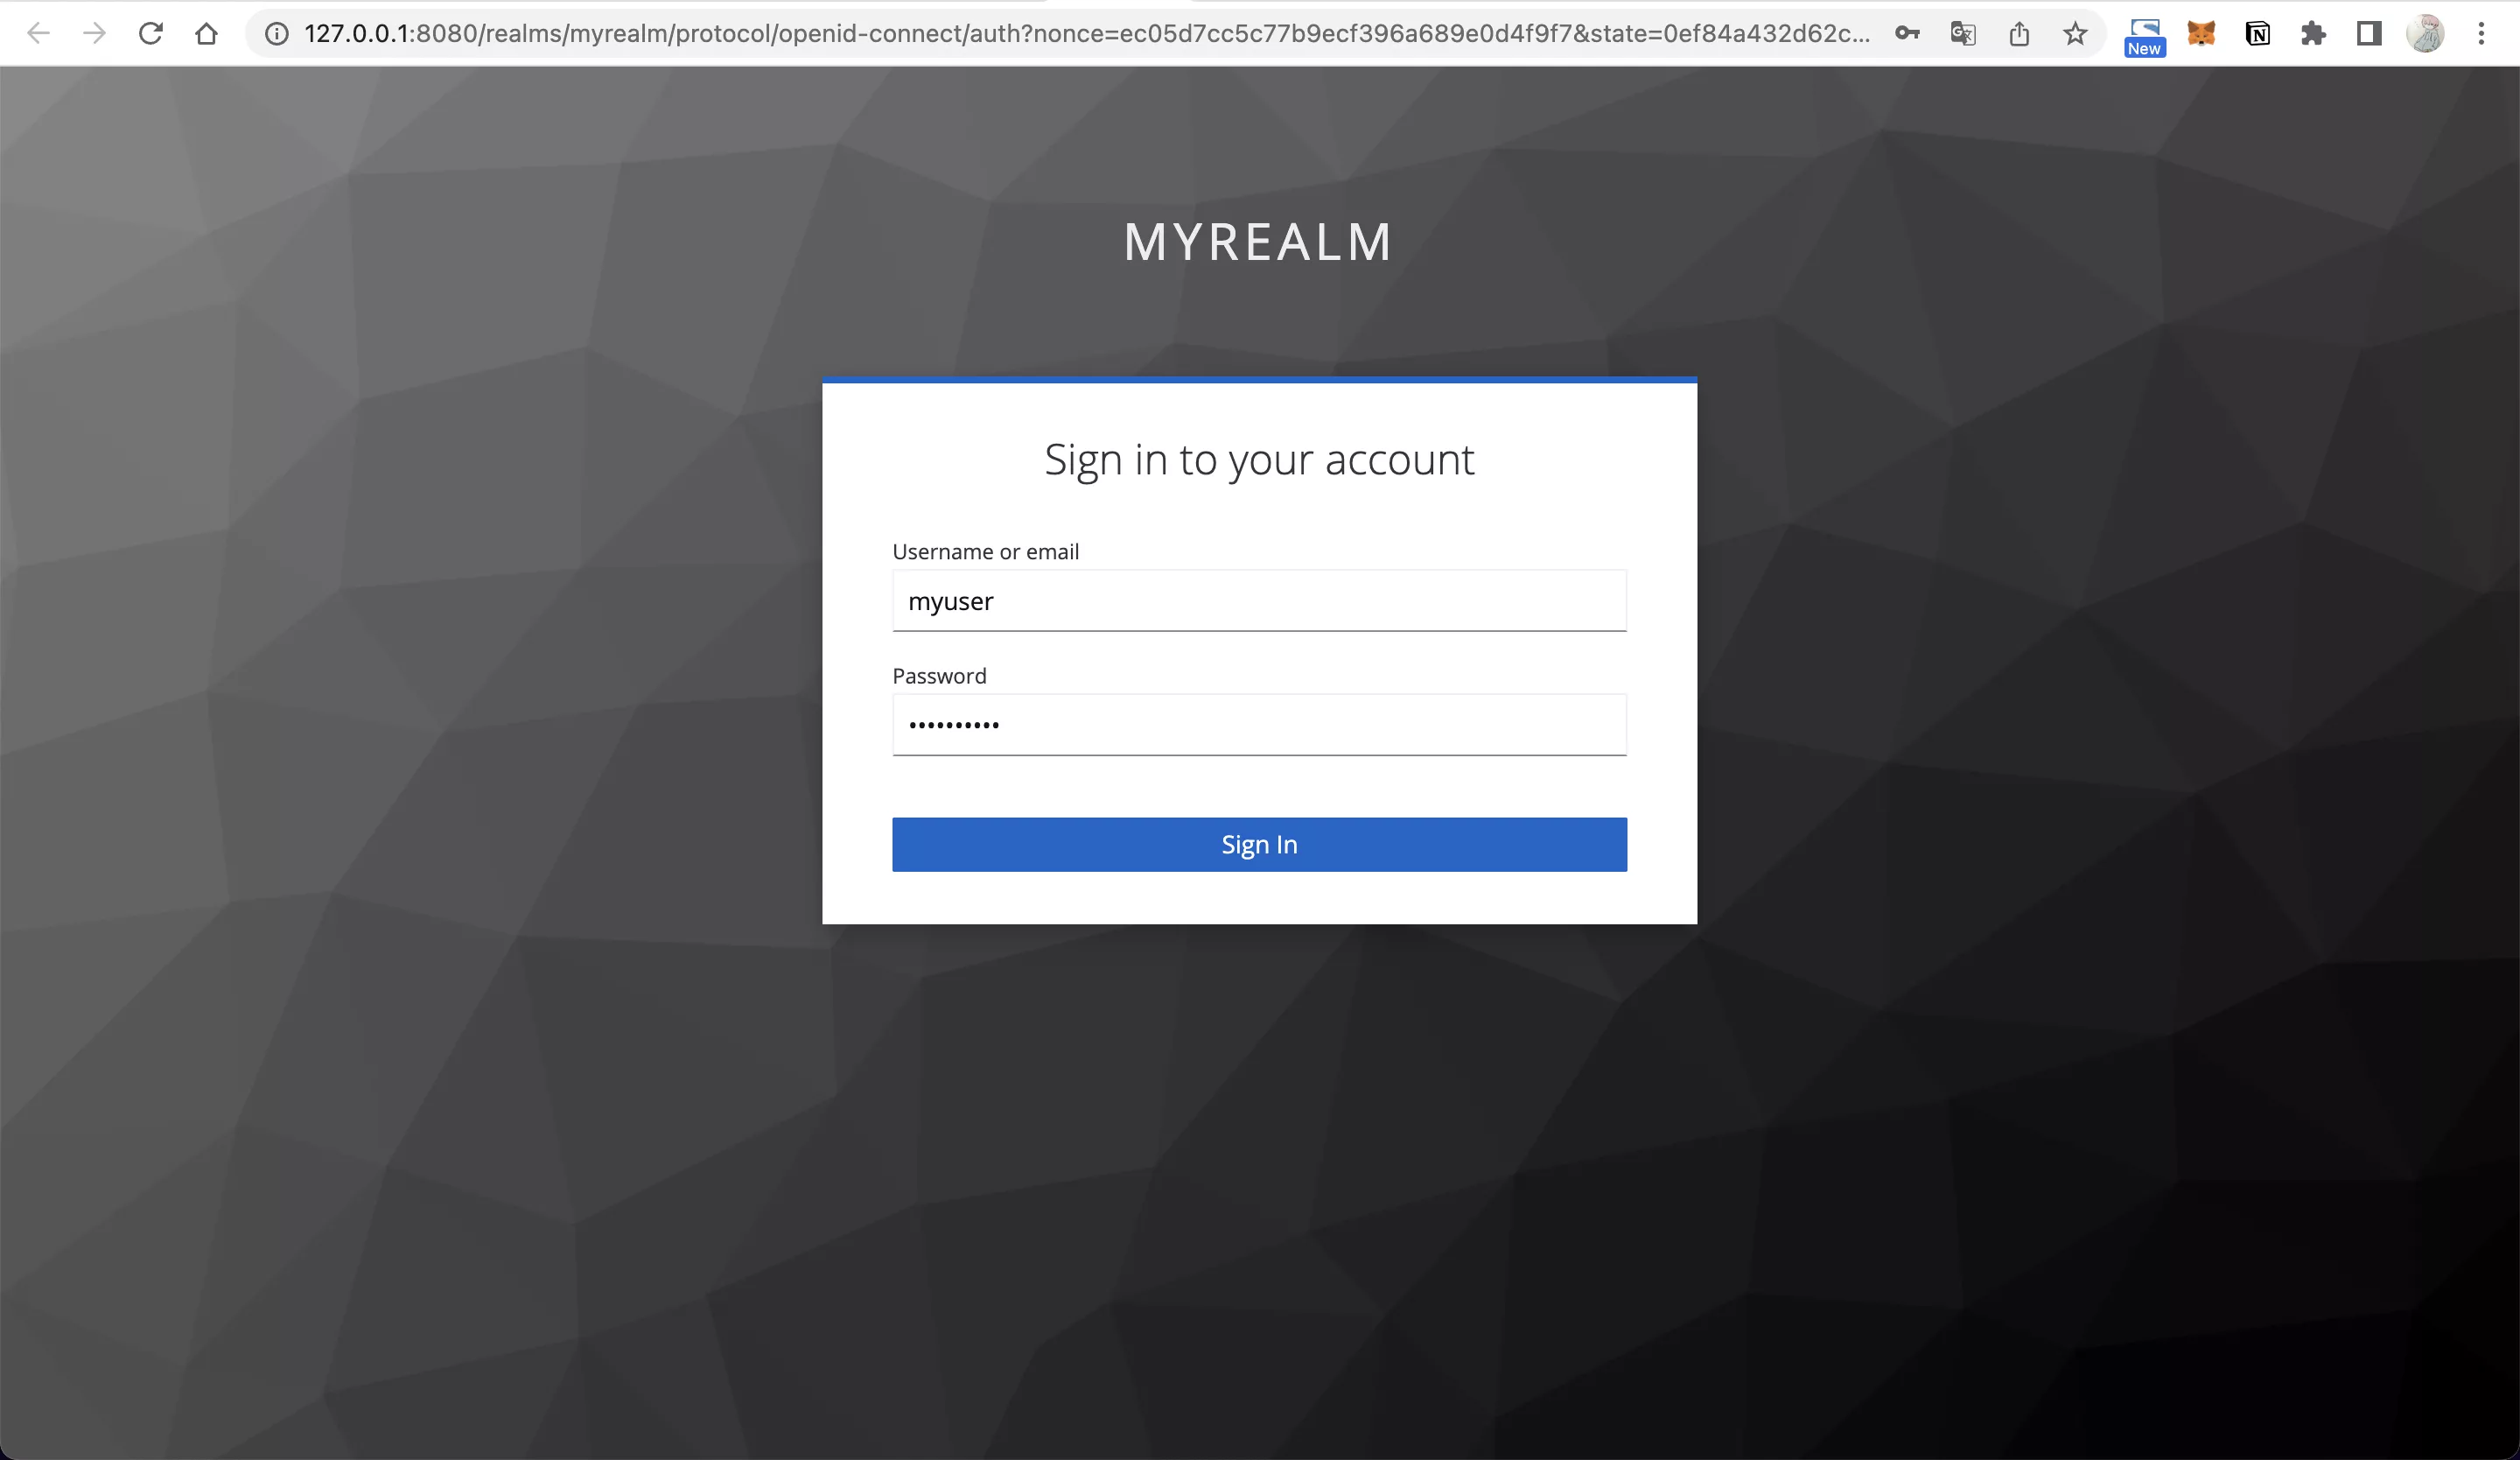
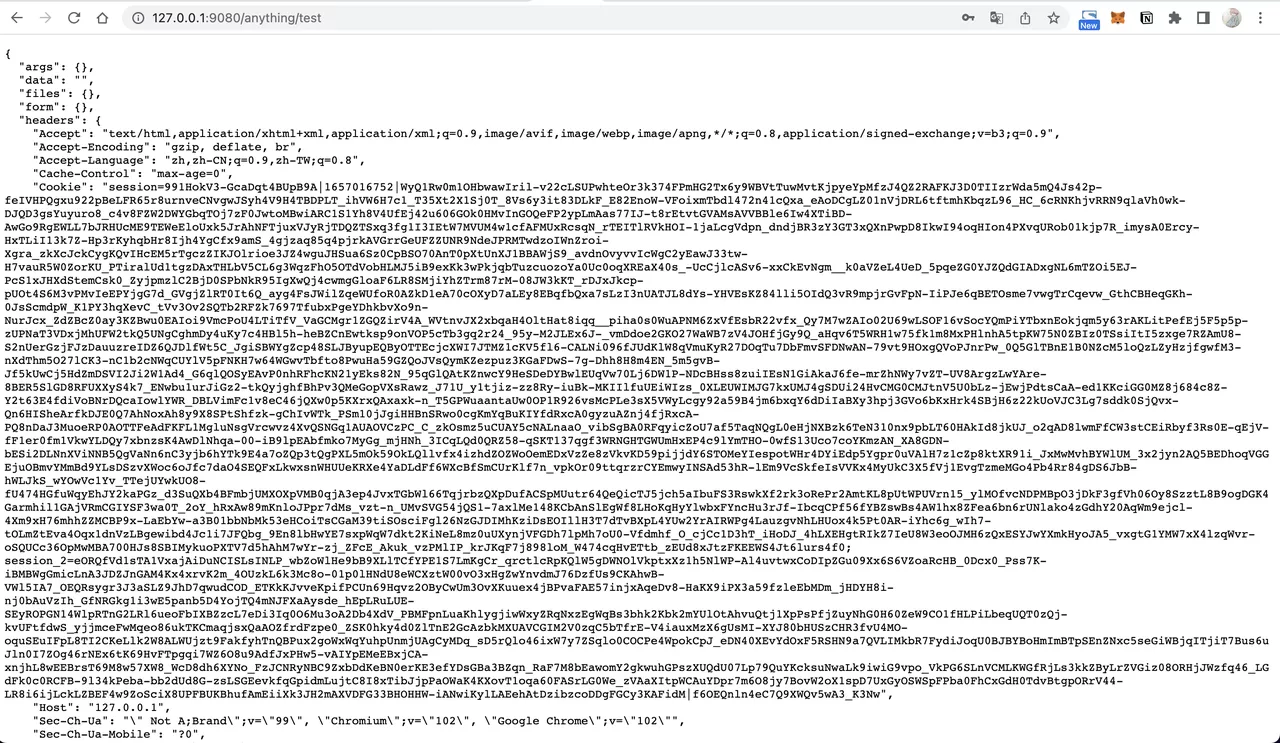
3. 輸入賬號(myuser)、密碼(mypassword)完成登錄后,成功跳轉到 http://127.0.0.1:9080/anything/test 頁面:
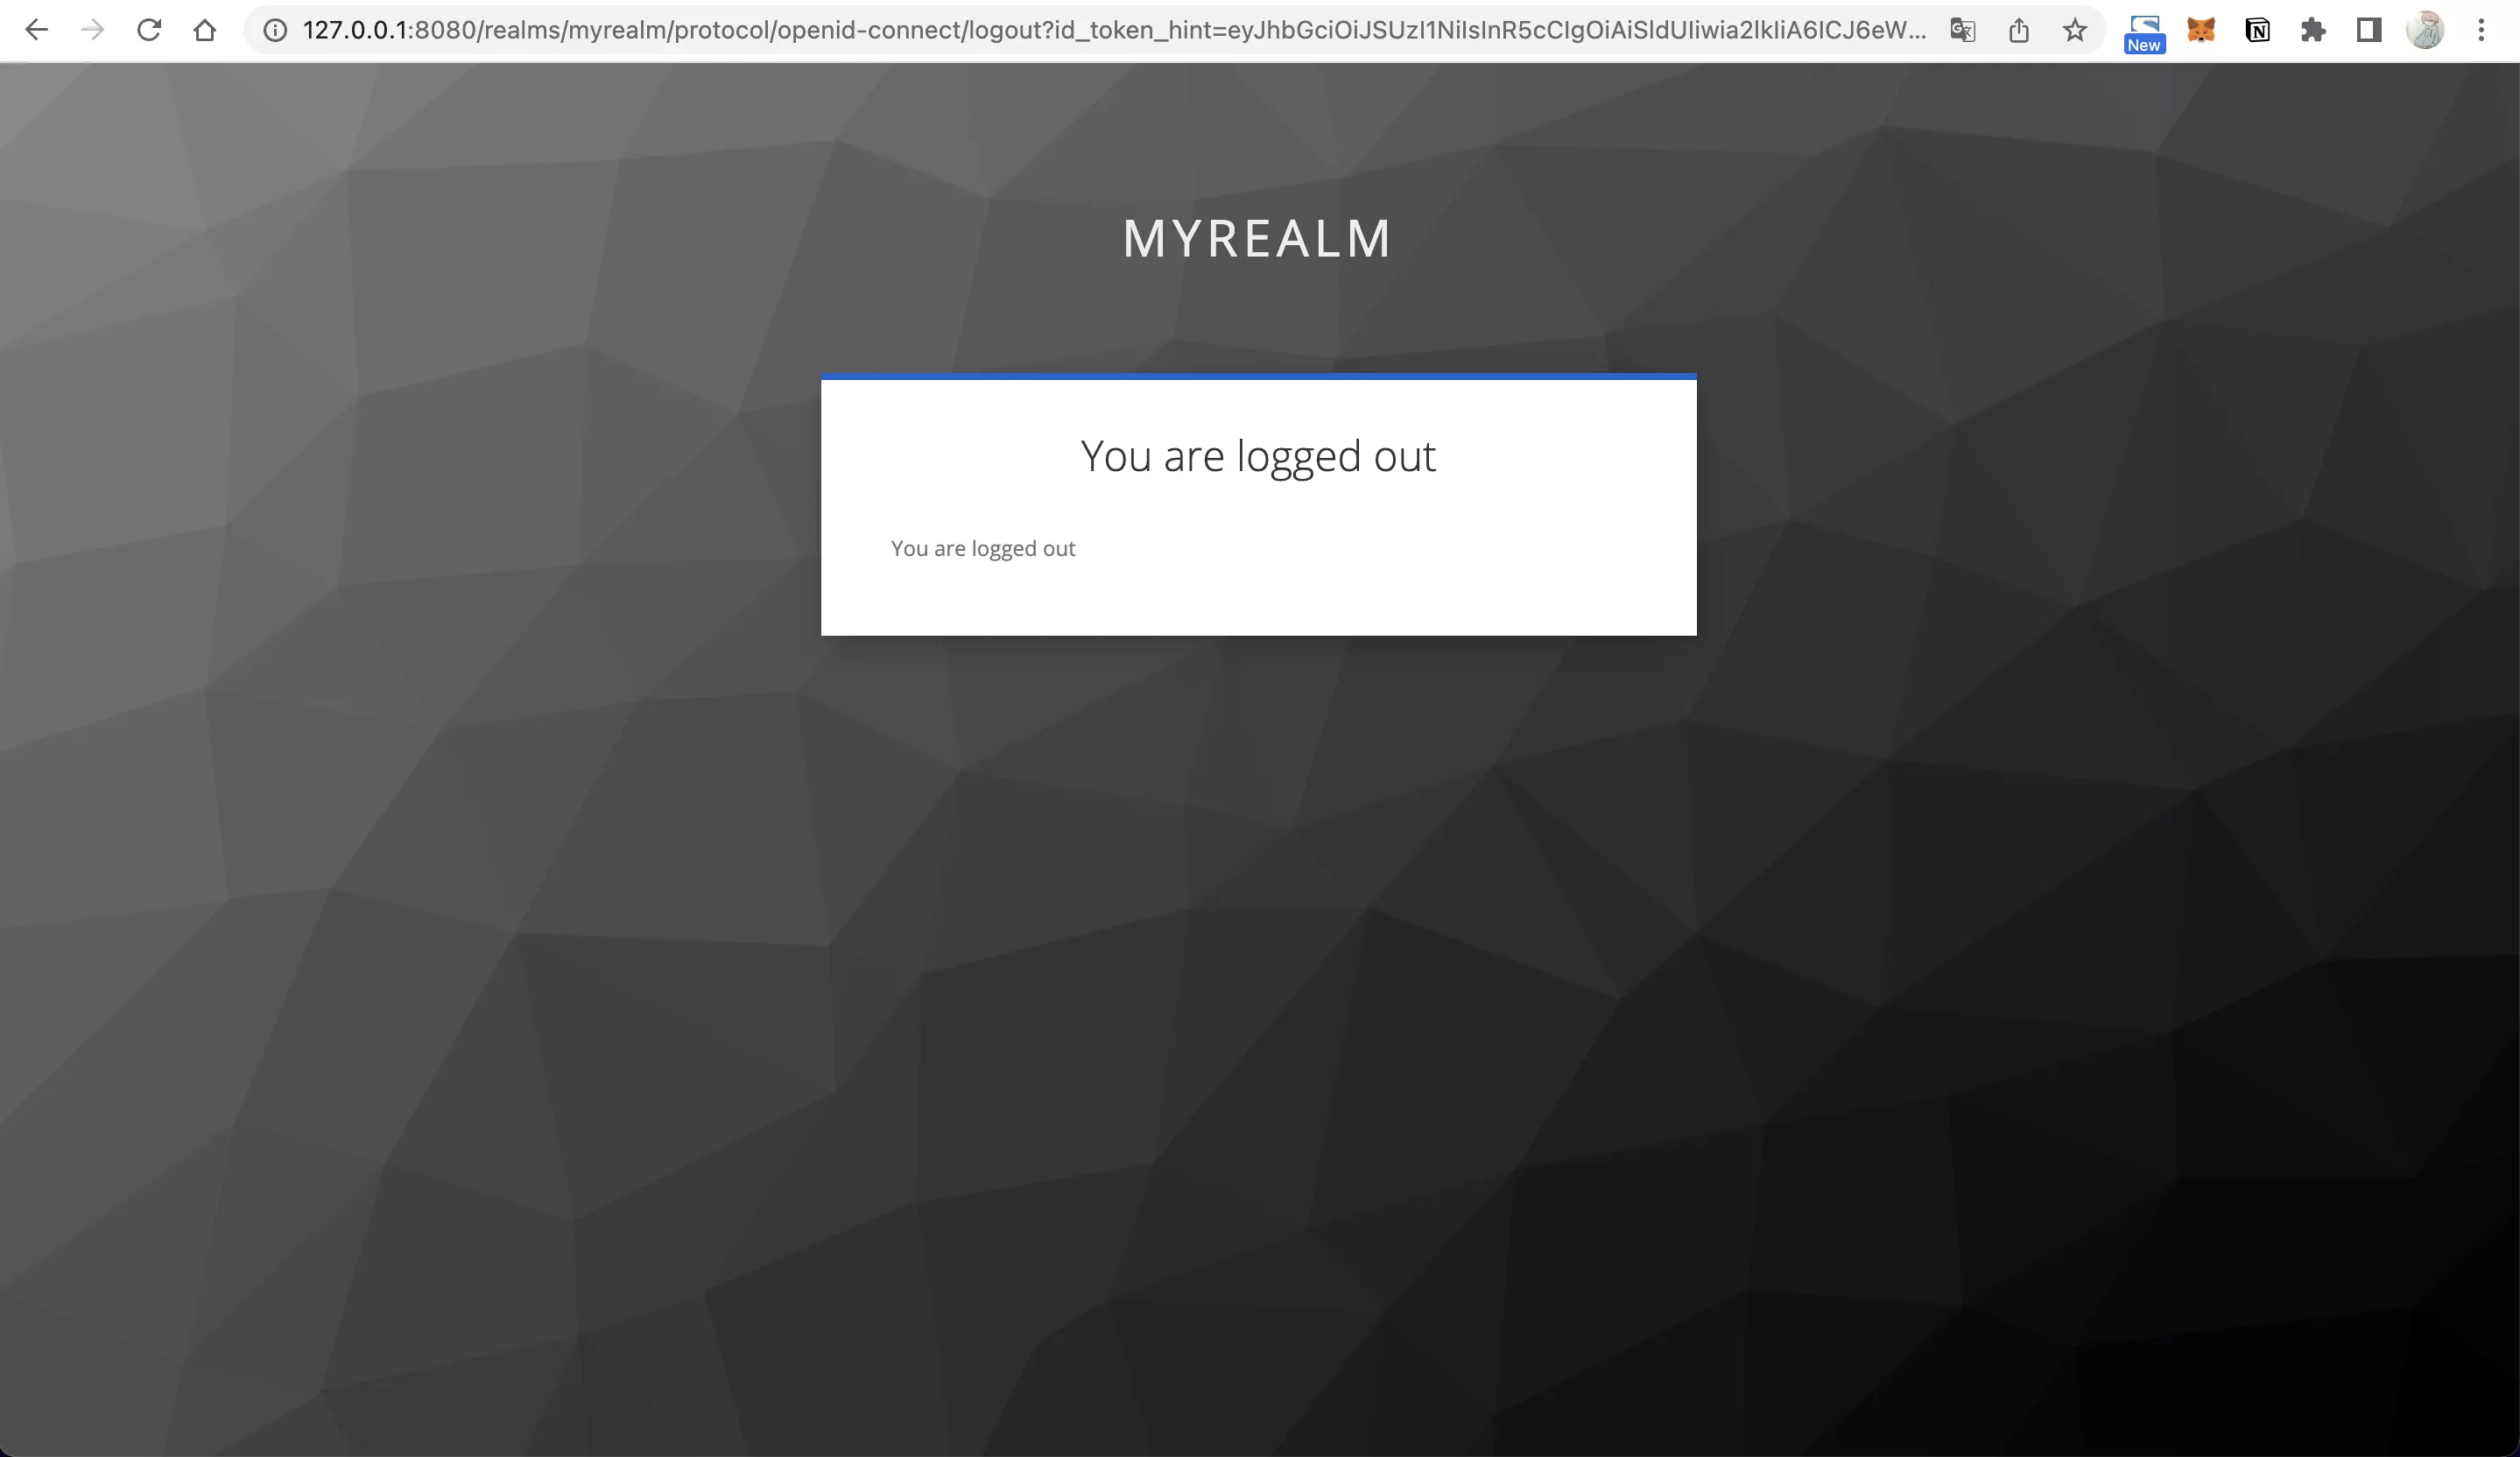
4. 訪問 http://127.0.0.1:9080/anything/logout 退出登錄:
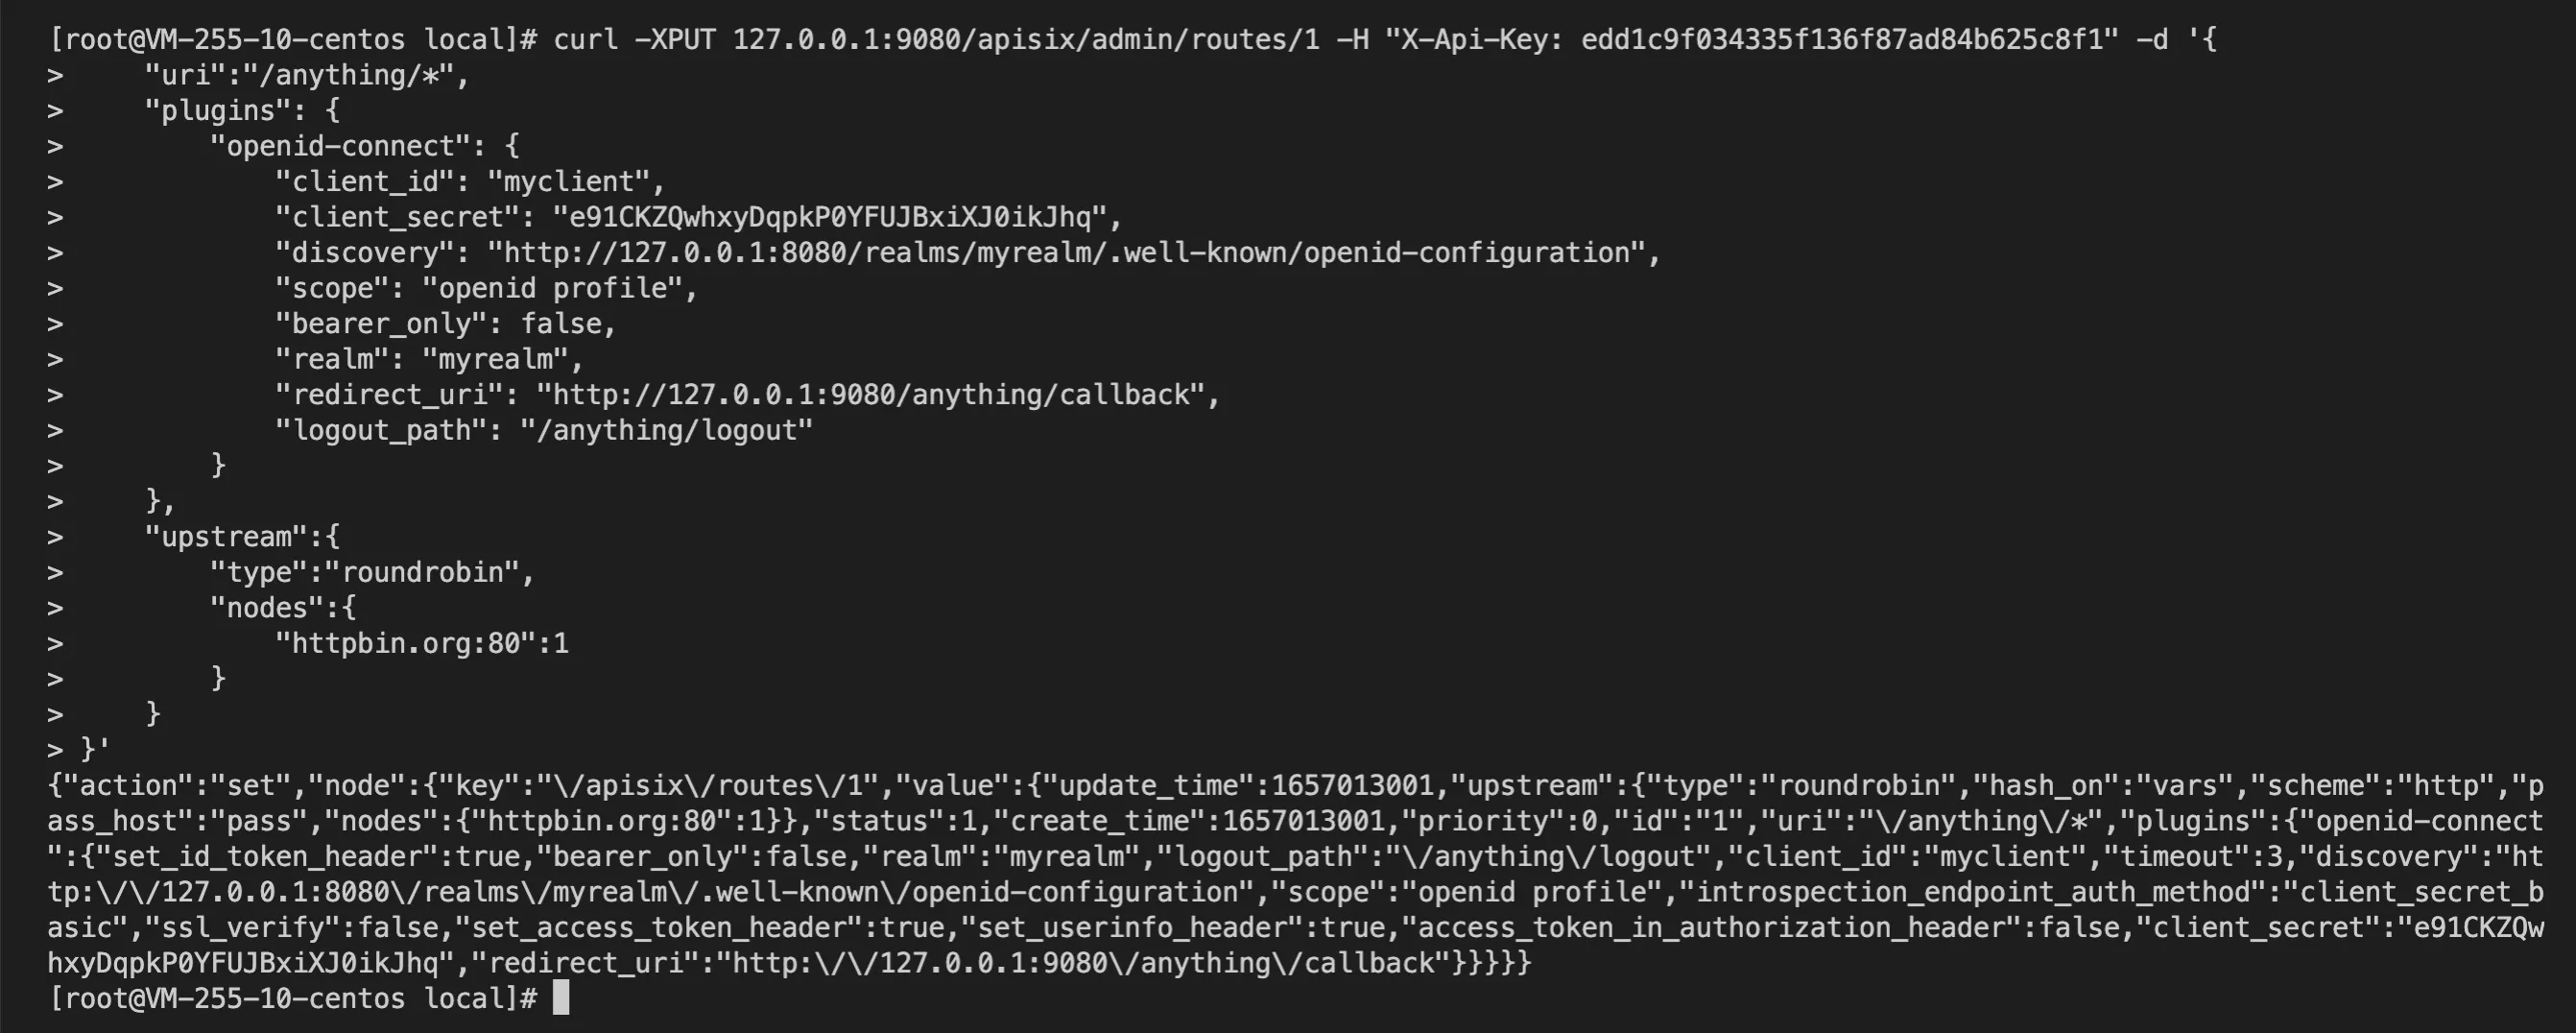
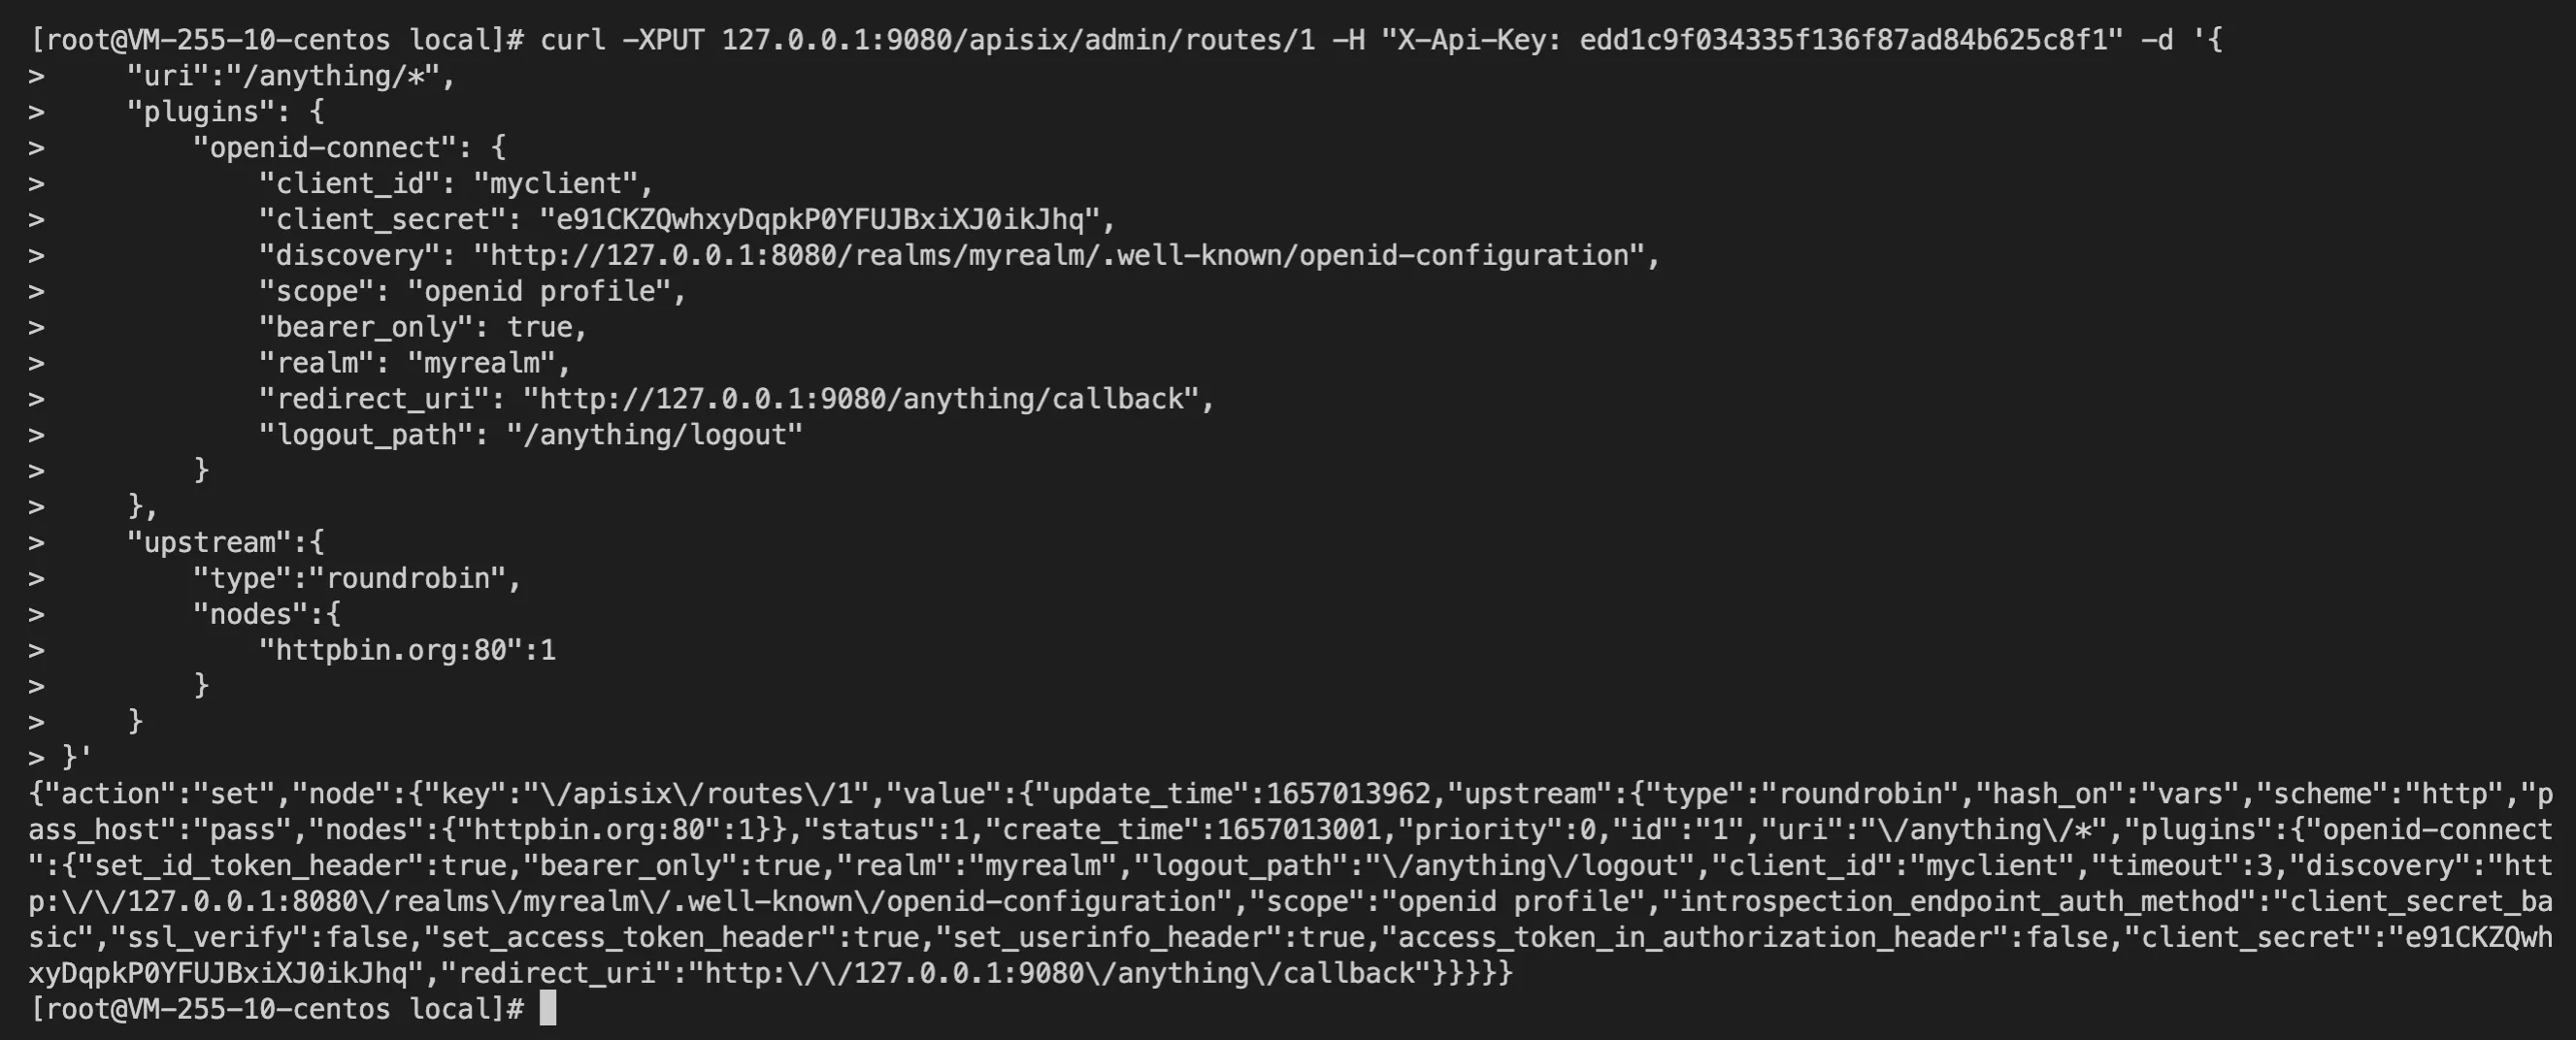
通過啟用 bearer_only 參數(shù)對應用之間的調用進行身份認證,此時應用訪問 APISIX 時需攜帶 Authorization Header,否則該請求將被拒絕。
curl -XPUT 127.0.0.1:9080/apisix/admin/routes/1 -H "X-API-KEY: edd1c9f034335f136f87ad84b625c8f1" -d '{
    "uri":"/anything/*",
    "plugins": {
        "openid-connect": {
            "client_id": "myclient",
            "client_secret": "e91CKZQwhxyDqpkP0YFUJBxiXJ0ikJhq",
            "discovery": "http://127.0.0.1:8080/realms/myrealm/.well-known/openid-configuration",
            "scope": "openid profile",
            "bearer_only": true,
            "realm": "myrealm",
            "redirect_uri": "http://127.0.0.1:9080/anything/callback",
            "logout_path": "/anything/logout"
        }
    },
    "upstream":{
        "type":"roundrobin",
        "nodes":{
            "httpbin.org:80":1
        }
    }
}'
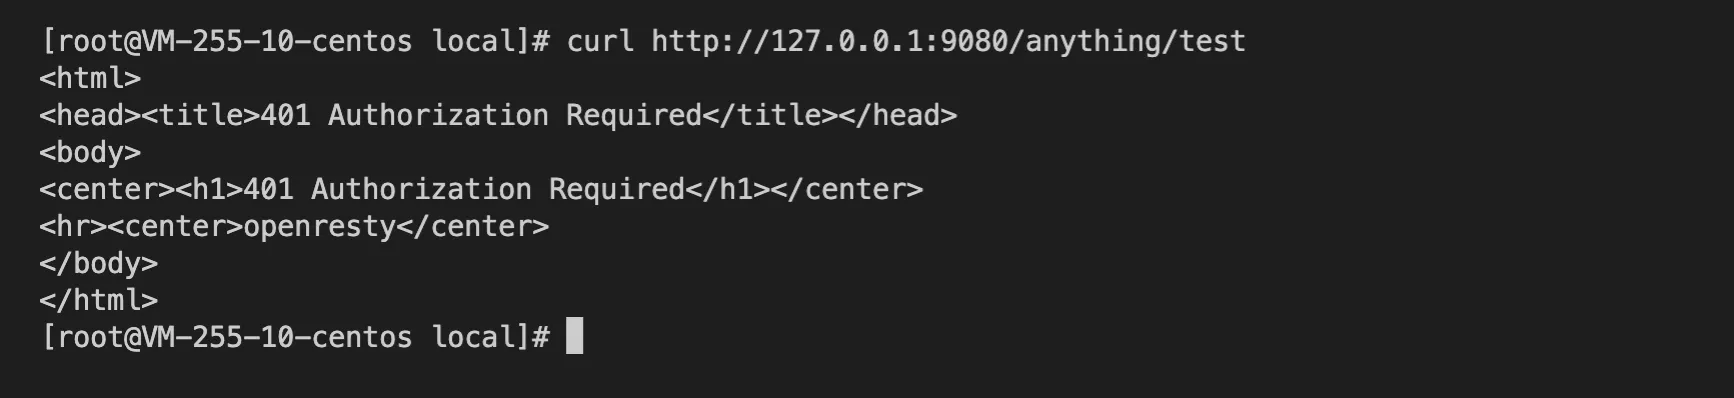
2. 未攜帶 X-Access-Token 訪問 Apache APISIX 時將返回 401 表明未經授權:
3. 調用 Keycloak API 獲取 AccessToken:
curl -XPOST "http://127.0.0.1:8080/realms/myrealm/protocol/openid-connect/token" -d "grant_type=password&username=myuser&client_id=myclient&client_secret=e91CKZQwhxyDqpkP0YFUJBxiXJ0ikJhq&password=mypassword"
4. 將 AccessToken 放于 Authorization 頭中請求 APISIX(替換掉 ${AccessToken}),可以認證成功:
curl http://127.0.0.1:9080/anything/test -H "Authorization: Bearer ${AccessToken}"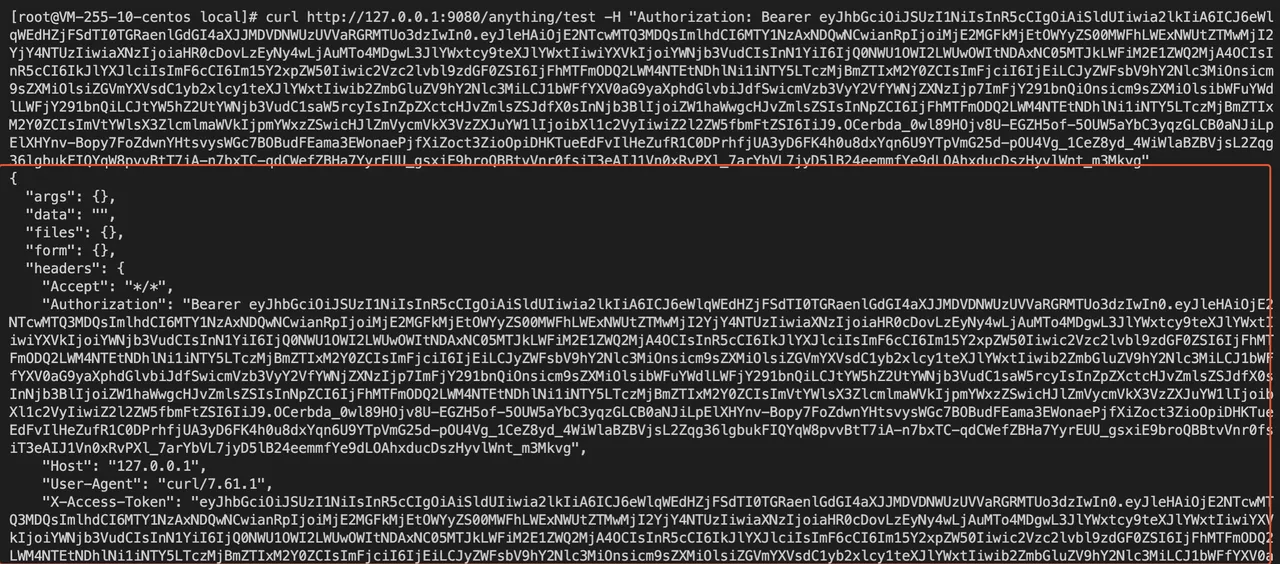
當啟用 APISIX set_userinfo_header 配置后,認證成功后回調請求將攜帶 X-Userinfo 請求頭,它包含了 User 的基本信息,可通過 base64_decode 獲得用戶內容。
因為 APISIX 會將 id_token、access_token、refresh_token 等值寫入 Cookie 中,因此整個 Cookie 內容比較長。具體實現(xiàn)可閱讀 lua-resty-openidc 庫中設置 session 的邏輯。
目前 openid-connect 插件未提供自定義這部分配置的能力,因此可以使用 lua-resty-session 中提供的方法:通過 NGINX 變量的方式對其默認配置進行覆蓋。 此處借助 APISIX 提供的 NGINX 配置注入能力以實現(xiàn)覆蓋:通過在配置文件 {apisix}/conf/config.yaml 中添加這些代碼,可修改 Session 存儲 Cookie 的名稱:
nginx_config:
  http_server_configuration_snippet: |
set $session_name "session_override";原文來源:Protect your API with Keyclone and API Gateway