如何快速實現(xiàn)REST API集成以優(yōu)化業(yè)務流程
加載預訓練pipeline并配置DDIM調度器,而后進行一次采樣,代碼如下:
# 載入一個管線

pipe = StableDiffusionPipeline.from_pretrained("runwayml/stable-

 diffusion-v1-5").to(device)

# 配置DDIM調度器

pipe.scheduler = DDIMScheduler.from_config(pipe.scheduler.config)

# 從中采樣一次,以保證代碼運行正常

prompt = 'Beautiful DSLR Photograph of a penguin on the beach,

 golden hour'

negative_prompt = 'blurry, ugly, stock photo'

im = pipe(prompt, negative_prompt=negative_prompt).images[0]

im.resize((256, 256)) # 調整至有利于查看的尺寸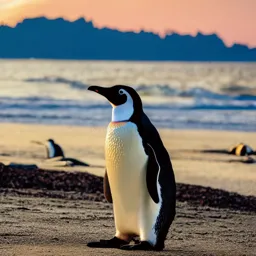
給定任意時刻t,加噪后的圖像公式如下所示:

下面是繪制加噪alpha的隨時間步的變化:
# 繪制'alpha','alpha'(即α)在DDPM論文中被稱為'alpha bar'(即α)。

# 為了能夠清晰地表現(xiàn)出來,我們

# 選擇使用Diffusers中的alphas_cumprod函數(shù)來得到alphas)

timesteps = pipe.scheduler.timesteps.cpu()

alphas = pipe.scheduler.alphas_cumprod[timesteps]

plt.plot(timesteps, alphas, label='alpha_t');

plt.legend();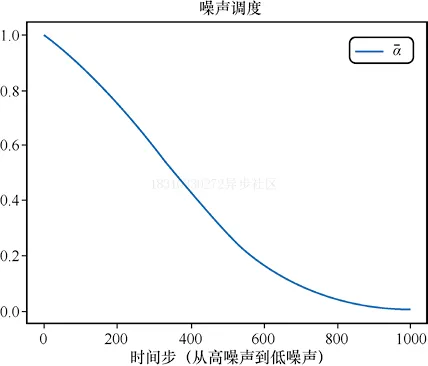
標準DDIM(https://arxiv.org/abs/2010.02502)采樣的實現(xiàn)代碼如下所示:
# 采樣函數(shù)(標準的DDIM采樣)

@torch.no_grad()

def sample(prompt, start_step=0, start_latents=None,

           guidance_scale=3.5, num_inference_steps=30,

           num_images_per_prompt=1, do_classifier_free_ guidance=True,

           negative_prompt='', device=device):

# 對文本提示語進行編碼

    text_embeddings = pipe._encode_prompt(

            prompt, device, num_images_per_prompt,

            do_classifier_free_guidance, negative_prompt

    )

# 配置推理的步數(shù)

    pipe.scheduler.set_timesteps(num_inference_steps, device=device)


# 如果沒有起點,就創(chuàng)建一個隨機的起點

    if start_latents is None:

       start_latents = torch.randn(1, 4, 64, 64, device=device)

       start_latents *= pipe.scheduler.init_noise_sigma


    latents = start_latents.clone()


    for i in tqdm(range(start_step, num_inference_steps)):


        t = pipe.scheduler.timesteps[i]

# 如果正在進行CFG,則對隱層進行擴展

    latent_model_input = torch.cat([latents] * 2)

 if do_classifier_free_guidance else latents

    latent_model_input = pipe.scheduler.scale_model_input(latent_

       model_input, t)

# 預測殘留的噪聲

    noise_pred = pipe.unet(latent_model_input, t, encoder_hidden_

       states=text_embeddings).sample

# 進行引導

    if do_classifier_free_guidance:

            noise_pred_uncond, noise_pred_text = noise_pred.chunk(2)

            noise_pred = noise_pred_uncond + guidance_scale *

               (noise_pred_text - noise_pred_uncond)


    # 使用調度器更新步驟

        # latents = pipe.scheduler.step(noise_pred, t, latents).

 # prev_sample

 # 現(xiàn)在不用調度器,而是自行實現(xiàn)

        prev_t = max(1, t.item() - (1000//num_inference_steps)) # t-1

        alpha_t = pipe.scheduler.alphas_cumprod[t.item()]

        alpha_t_prev = pipe.scheduler.alphas_cumprod[prev_t]

        predicted_x0 = (latents - (1-alpha_t).sqrt()*noise_pred) /

           alpha_t.sqrt()

        direction_pointing_to_xt = (1-alpha_t_prev).sqrt()*noise_

           pred

        latents = alpha_t_prev.sqrt()*predicted_x0 + direction_

           pointing_to_xt

# 后處理


    images = pipe.decode_latents(latents)

    images = pipe.numpy_to_pil(images)


    return images

# 生成一張圖片,測試一下采樣函數(shù),效果如圖7-4所示

sample('Watercolor painting of a beach sunset', negative_prompt=

   negative_prompt, num_inference_steps=50)[0].resize((256, 256))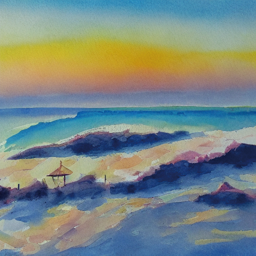
反轉的目標是”顛倒“采樣的過程。我們最終想得到”帶噪“的隱式表示。如果將其用作采樣過程的起點,那么生成的圖像將是原始圖像。
? ? ? ?我們現(xiàn)在首先來加載一張圖像,來看看DDIM反轉如何做?有什么效果?
#圖片來源:https://www.pexels.com/photo/a-beagle-on-green-grass-

 # field-8306128/(代碼中使用對應的JPEG文件鏈接)

input_image = load_image('https://images.pexels.com/photos/

 8306128/pexels-photo-8306128.jpeg', size=(512, 512))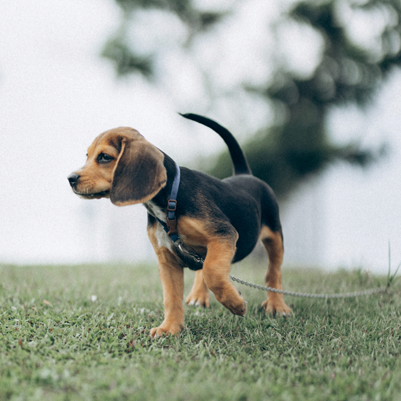
??我們使用一個包含無分類器引導的文本Prompt來進行反轉操作,代碼如下:
input_image_prompt = "Photograph of a puppy on the grass"? ? ? ?接下來,我們將這幅PIL圖像轉換為一系列隱式表示,這些隱式表示將被用作反轉操作的起點。
# 使用VAE進行編碼

with torch.no_grad(): latent = pipe.vae.encode(tfms.functional.to_

   tensor(input_image).unsqueeze(0).to(device)*2-1)

l = 0.18215 * latent.latent_dist.sample()
我們使用invert函數(shù)進行反轉,可以看出invert與上面的sample函數(shù)非常類似,但是invert函數(shù)是朝相反的方向移動的:從t=0開始,想噪聲更多的方向移動的,而不是在更新隱式層的過程中那樣噪聲越來越少。我們可以利用預測的噪聲來撤回一步更新操作,并從t移動到t+1。
## 反轉

@torch.no_grad()

def invert(start_latents, prompt, guidance_scale=3.5,

           num_inference_steps=80,num_images_per_prompt=1,

           do_classifier_free_guidance=True, negative_prompt='',

           device=device):

 # 對提示文本進行編碼

    text_embeddings = pipe._encode_prompt(

      prompt, device, num_images_per_prompt,

      do_classifier_free_guidance, negative_prompt

     )

     # 已經指定好起點

     latents = start_latents.clone()

     # 用一個列表保存反轉的隱層

     intermediate_latents = []

     # 配置推理的步數(shù)

     pipe.scheduler.set_timesteps(num_inference_steps,device=device)

     # 反轉的時間步

     timesteps = reversed(pipe.scheduler.timesteps)


     for i in tqdm(range(1, num_inference_steps), total=num_

         inference_steps-1):

 # 跳過最后一次迭代

     if i >= num_inference_steps - 1: continue


     t = timesteps[i]

 # 如果正在進行CFG,則對隱層進行擴展


     latent_model_input = torch.cat([latents] * 2) if do_

        classifier_free_guidance else latents

     latent_model_input = pipe.scheduler.scale_model_

        input(latent_model_input, t)

     # 預測殘留的噪聲

      noise_pred = pipe.unet(latent_model_input, t, encoder_

        hidden_states=text_embeddings).sample

     # 進行引導

     if do_classifier_free_guidance:

        noise_pred_uncond, noise_pred_text = noise_pred.chunk(2)

        noise_pred = noise_pred_uncond + guidance_scale *

       (noise_pred_text - noise_pred_uncond)

current_t = max(0, t.item() - (1000//num_inference_steps))#t

next_t = t # min(999, t.item() + (1000//num_inference_steps)) # t+1

alpha_t = pipe.scheduler.alphas_cumprod[current_t]

alpha_t_next = pipe.scheduler.alphas_cumprod[next_t]


# 反轉的更新步(重新排列更新步,利用xt-1(當前隱層)得到xt(新的隱層))

latents = (latents - (1-alpha_t).sqrt()*noise_pred)*(alpha_t_next.

   sqrt()/alpha_t.sqrt()) + (1-alpha_t_next).sqrt()*noise_pred

# 保存

intermediate_latents.append(latents)

return torch.cat(intermediate_latents)
將invert函數(shù)應用于上述小狗的圖片,得到圖片的一系列隱式表示。
inverted_latents = invert(l, input_image_prompt,num_inference_steps=50)

inverted_latents.shape
# 輸出
torch.Size([48, 4, 64, 64])
將得到的最終隱式表示作為起點噪聲,嘗試新的采樣過程。
# 解碼反轉的最后一個隱層

with torch.no_grad():

  im = pipe.decode_latents(inverted_latents[-1].unsqueeze(0))

pipe.numpy_to_pil(im)[0]
通過調用call方法將反轉隱式表示輸入給Pipeline。
pipe(input_image_prompt, latents=inverted_latents[-1][None],

      num_inference_steps=50, guidance_scale=3.5).images[0]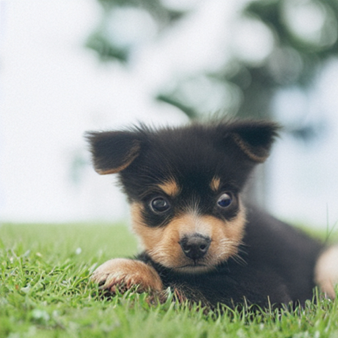
看到生成的圖片是不是有點蒙了,這不是剛開始輸入的圖片呀?
? ? ? 這是因為DDIM反轉需要一個重要的假設-在時刻t預測的噪聲與在時刻t+1預測的噪聲相同,但這個假設在反轉50步或100步是不成立的。
? ? ? ?我們既可以使用更多的時間步來得到更準確的反轉,也可以采取”作弊“的方法,直接從相應反轉過程50步中的第20步的隱式表示開始。
# 設置起點的原因

start_step=20

sample(input_image_prompt, start_latents=inverted_latents[-(start_step+1)]

[None], start_step=start_step, num_inference_steps=50)[0]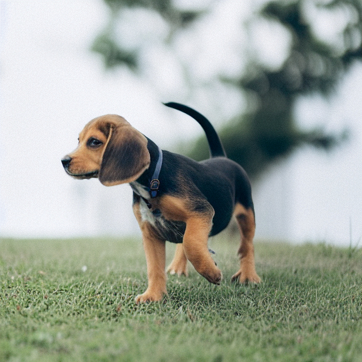
經過這一折騰,生成的圖片和原始圖片很接近了,那為什么要這么做呢?
? ? ? ?因為我們現(xiàn)在想用一個新的文本Prompt來生成圖片。我們想要得到一張除了與Prompt相關以外,其他內容都與原始圖片大致相同的圖片。例如,將小狗換成小貓,得到的結果如下所示:
# 使用新的文本提示語進行采樣

start_step=10

new_prompt = input_image_prompt.replace('puppy', 'cat')

sample(new_prompt, start_latents=inverted_latents[-(start_step+1)]

       [None],start_step=start_step, num_inference_steps=50)[0]
??到此為止,讀者可能有一些疑問,比如為什么不直接使用Img2Img?為什么要反轉?為什么不直接對輸入圖像添加噪聲,然后用新的Prompt直接”去噪“呢?
? ? ? ?其實是可以采用上述方法做的,但是生成的效果對添加的噪聲量十分敏感,噪聲量大時會生成十分夸張的圖片,噪聲量小時生成的圖片幾乎沒有變化。
start_step = 10

num_inference_steps=50

pipe.scheduler.set_timesteps(num_inference_steps)

noisy_l = pipe.scheduler.add_noise(l, torch.randn_like(l), pipe.

   scheduler.timesteps[start_step])

sample(new_prompt, start_latents=noisy_l, start_step=start_step,

    num_inference_steps=num_inference_steps)[0]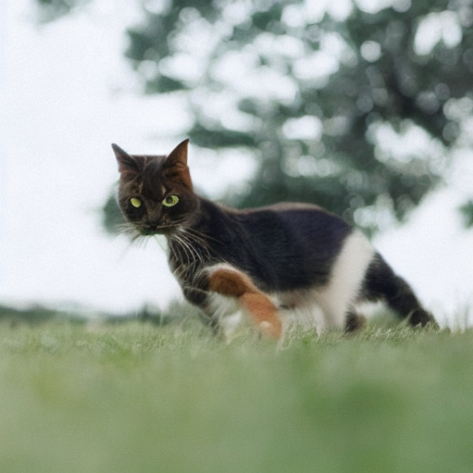
? ? ? 將上述代碼封裝到一個簡單函數(shù)中,并輸入一張圖片和兩個文本Prompt,便可以得到一張通過反轉修改后的圖片。
def edit(input_image, input_image_prompt, edit_prompt, num_steps=100,

 start_step=30,guidance_scale=3.5):

    with torch.no_grad(): latent = pipe.vae.encode(tfms.functional.

      to_tensor(input_image).unsqueeze(0).to(device)*2-1)

    l = 0.18215 * latent.latent_dist.sample()

    inverted_latents = invert(l, input_image_prompt,num_inference_

       steps=num_steps)

    final_im = sample(edit_prompt, start_latents=inverted_latents[

       -(start_step+1)][None],start_step=start_step, num_inference_

       steps=num_steps,guidance_scale=guidance_scale)[0]

    return final_im

And in action: # 實際操作

edit(input_image, 'A puppy on the grass', 'an old grey dog on

the grass', num_steps=50,start_step=10) 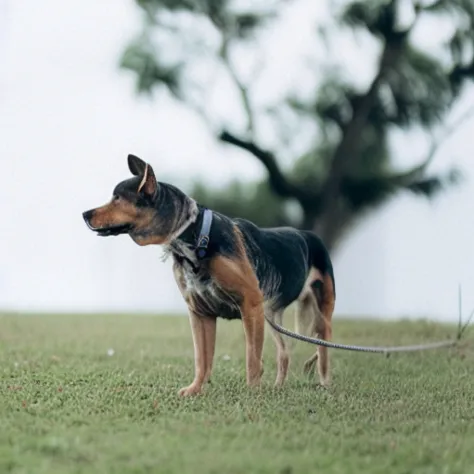
修改一下Prompt和參數(shù)來看看效果如何不同
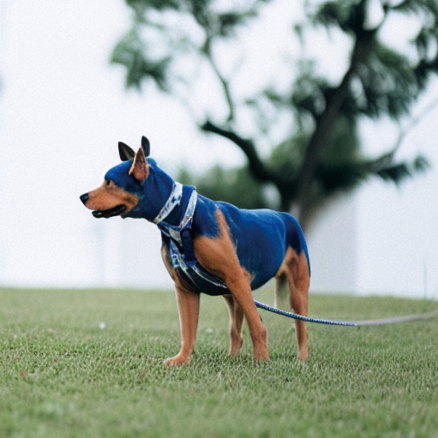
edit(input_image, 'A puppy on the grass', 'A blue dog on the lawn',

 num_steps=50,start_step=12, guidance_scale=6)
得到如下圖片
更多迭代能夠得到更好的表現(xiàn),我們可以測試一下
# 更多步的反轉測試

edit(input_image, 'A puppy on the grass', 'A puppy on the grass',

     num_steps=350, start_step=1)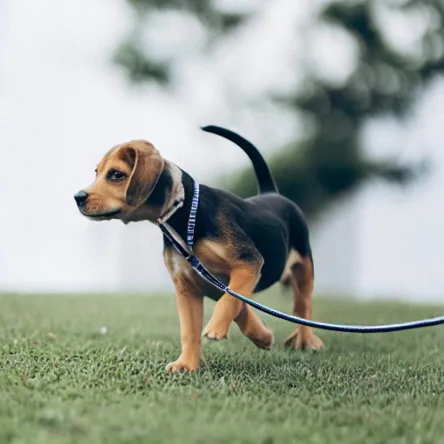
我們換一張圖片進行測試一下看看效果
原始圖片如下所示:
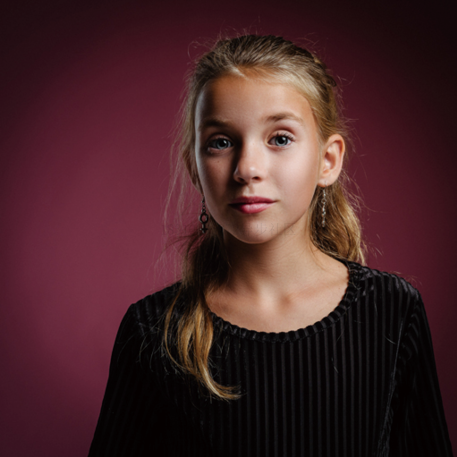
# 圖片來源:https://www.pexels.com/photo/girl-taking-photo-1493111/
# (代碼中使用對應的JPEG文件鏈接)
face = load_image('https://images.pexels.com/photos/1493111/pexels-
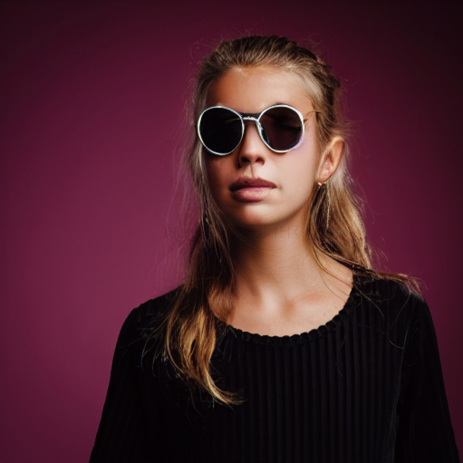
photo-1493111.jpeg', size=(512, 512))edit(face, 'A photograph of a face', 'A photograph of a face with
sunglasses', num_steps=250, start_step=30, guidance_scale=3.5)生成的效果如下所示:
PS:讀者可以通過測試不同的Prompt來觀察生成的效果,強烈建議了解一下Null-text Inversion:一個基于DDIM來優(yōu)化空文本(無條件Prompt)的反轉過程,有更準確的反轉過程與更好的編輯效果。
文章轉自微信公眾號@ArronAI