node.js + express + docker + mysql + jwt 實現用戶管理restful api
pip install fastapi uvicorn


# or

poetry add fastapi uvicorn

pipenv install fastapi uvicorn

conda install fastapi uvicorn -c conda-forge
與 Flask 不同,FastAPI 沒有內置的開發服務器,因此需要像 Uvicorn 或 Daphne 這樣的 ASGI 服務器。
Flask
# flask_code.py


from flask import Flask


app = Flask(__name__)


@app.route("/")

def home():

    return {"Hello": "World"}


if __name__ == "__main__":

    app.run()
FastAPI
# fastapi_code.py


import uvicorn

from fastapi import FastAPI


app = FastAPI()


@app.get("/")

def home():

    return {"Hello": "World"}


if __name__ == "__main__":

    uvicorn.run("fastapi_code:app")
像 reload=True 這樣的參數可以被傳遞到 uvicorn.run() 中,以實現開發時的熱重載。
或者,您可以直接從終端啟動服務器:
uvicorn run fastapi_code:app熱加載模式:
uvicorn run fastapi_code:app --reloadFlask 和 FastAPI 都提供了許多選項來處理不同環境的不同配置。兩者都支持以下模式:
有關更多信息,請參閱其各自的文檔:
Flask
import os

from flask import Flask


class Config(object):

    MESSAGE = os.environ.get("MESSAGE")


app = Flask(__name__)

app.config.from_object(Config)


@app.route("/settings")

def get_settings():

    return { "message": app.config["MESSAGE"] }


if __name__ == "__main__":

    app.run()
現在,在你運行服務器之前,設置適當的環境變量:
export MESSAGE="hello, world"FastAPI
import uvicorn

from fastapi import FastAPI

from pydantic import BaseSettings


class Settings(BaseSettings):

    message: str


settings = Settings()

app = FastAPI()


@app.get("/settings")

def get_settings():

    return { "message": settings.message }


if __name__ == "__main__":

    uvicorn.run("fastapi_code:app")
同樣,在運行服務器之前,設置適當的環境變量:
export MESSAGE="hello, world"Flask
from flask import request


@app.route("/", methods=["GET", "POST"])

def home():

    # handle POST

    if request.method == "POST":

        return {"Hello": "POST"}

    # handle GET

    return {"Hello": "GET"}
FastAPI
@app.get("/")

def home():

    return {"Hello": "GET"}


@app.post("/")

def home_post():

    return {"Hello": "POST"}
FastAPI 為每個方法提供單獨的裝飾器:
@app.get("/")

@app.post("/")

@app.delete("/")

@app.patch("/")通過 URL(如 /employee/1 )傳遞信息以管理狀態:
Flask
@app.route("/employee/<int:id>")

def home():

    return {"id": id}
FastAPI
@app.get("/employee/{id}")

def home(id: int):

    return {"id": id}
URL參數的指定類似于一個 f-string 表達式。此外,你還可以利用類型提示。這里,我們在運行時告訴 Pydantic, id 是 int 類型的。在開發中,這也可以幫助完成更好的代碼完成度。
與 URL 參數一樣,查詢參數(如 /employee?department=sales )也可用于管理狀態(通常用于過濾或排序):
Flask
from flask import request


@app.route("/employee")

def home():

    department = request.args.get("department")

return {"department": department}@app.get("/employee")
def home(department: str):
return {"department": department}Flask
from flask import render_template


@app.route("/")

def home():

    return render_template("index.html")
默認情況下,Flask會在 “templates “文件夾中尋找模板。
FastAPI
你需要安裝 Jinja:
pip install jinja2實現:
from fastapi import Request

from fastapi.templating import Jinja2Templates

from fastapi.responses import HTMLResponse


app = FastAPI()


templates = Jinja2Templates(directory="templates")


@app.get("/", response_class=HTMLResponse)

def home(request: Request):

    return templates.TemplateResponse("index.html", {"request": request})
對于 FastAPI,你需要明確地定義 “模板 “文件夾。然后對于每個響應,需要提供請求上下文。
Flask
默認情況下,Flask 從“static”文件夾中提供靜態文件。
FastAPI
在 FastAPI 中,需要為靜態文件掛載一個文件夾:
from fastapi.staticfiles import StaticFiles


app = FastAPI()


app.mount("/static", StaticFiles(directory="static"), name="static")Flask
從 Flask 2.0 開始,您可以使用?async/await?創建異步路由處理程序:
@app.route("/")

async def home():

    result = await some_async_task()

    return result
有關 Flask 中異步視圖的更多信息,請查看 Flask 2.0 中的異步一文。
Flask 中的異步也可以通過使用線程(并發)或多處理(并行)或 Celery 或 RQ 等工具來實現:
FastAPI
由于 FastAPI 對 asyncio 的原生支持,它極大地簡化了異步任務。要使用的話,只需在視圖函數中添加?async?關鍵字:
@app.get("/")

async def home():

    result = await some_async_task()

    return result
FastAPI 還具有后臺任務功能,您可以使用它來定義返回響應后要運行的后臺任務。這對于不需要在發送回響應之前完成的操作很有用。
from fastapi import BackgroundTasks


def process_file(filename: str):

    # process file :: takes minimum 3 secs (just an example)

    pass


@app.post("/upload/{filename}")

async def upload_and_process(filename: str, background_tasks: BackgroundTasks):

    background_tasks.add_task(process_file, filename)

    return {"message": "processing file"}
在這里,響應將被即時發送,而不會讓用戶等待文件處理完成。
當你需要進行繁重的后臺計算時,或者你需要一個任務隊列來管理任務(tasks)和工作者(workers)時,你可能想使用Celery 而不是 BackgroundTasks。更多內容請參考 FastAPI 和 Celery 的異步任務:https://testdriven.io/blog/fastapi-and-celery/
Flask
雖然你可以實現自己的依賴注入解決方案,但 Flask 默認沒有真正的一流支持。相反,你需要使用一個外部包,如 flask-injector。
FastAPI
另一方面,FastAPI 具有處理依賴注入的強大解決方案。
例如:
from databases import Database

from fastapi import Depends

from starlette.requests import Request


from db_helpers import get_all_data

def get_db(request: Request):

    return request.app.state._db


@app.get("/data")

def get_data(db: Database = Depends(get_db)):

return get_all_data(db)因此,get_db 將獲取對在應用程序的啟動事件處理程序中創建的數據庫連接的引用。 Depends 然后用于向 FastAPI 指示路由“依賴于” get_db。因此,它應該在路由處理程序中的代碼之前執行,并且結果應該“注入”到路由本身。
Flask
Flask 沒有任何內部數據驗證支持。您可以使用功能強大的 Pydantic 包通過 Flask-Pydantic 進行數據驗證。
FastAPI
FastAPI 如此強大的原因之一是它支持 Pydantic。
from pydantic import BaseModel


app = FastAPI()


class Request(BaseModel):

    username: str

    password: str


@app.post("/login")

async def login(req: Request):

    if req.username == "testdriven.io" and req.password == "testdriven.io":

        return {"message": "success"}

return {"message": "Authentication Failed"}在這里,我們接受一個模型?Request?的輸入。該 payload 必須包含一個用戶名和密碼。
# correct payload format

? curl -X POST 'localhost:8000/login' \

    --header 'Content-Type: application/json' \

    --data-raw '{"username": "testdriven.io","password":"testdriven.io"}'


{"message":"success"}


# incorrect payload format

? curl -X POST 'localhost:8000/login' \

    --header 'Content-Type: application/json' \

    --data-raw '{"username": "testdriven.io","passwords":"testdriven.io"}'


{"detail":[{"loc":["body","password"],"msg":"field required","type":"value_error.missing"}]}
注意到這個請求。我們把密碼 passwords 作為一個鍵而不是 password 傳遞進去。Pydantic 模型會自動告訴用戶,password 字段是缺失的。
Flask
最簡單的序列化方法是使用 jsonify:
from flask import jsonify

from data import get_data_as_dict


@app.route("/")

def send_data():

    return jsonify(get_data_as_dict)
對于復雜的對象,Flask 開發者經常使用 Flask-Marshmallow
FastAPI
FastAPI 自動序列化任何返回的字典?dict?。對于更復雜和結構化的數據,使用 Pydantic:
from pydantic import BaseModel


app = FastAPI()


class Request(BaseModel):

    username: str

    email: str

    password: str


class Response(BaseModel):

    username: str

    email: str


@app.post("/login", response_model=Response)

async def login(req: Request):

    if req.username == "testdriven.io" and req.password == "testdriven.io":

        return req

    return {"message": "Authentication Failed"}
在這里,我們添加了一個包含三個輸入的 Request 模型:用戶名、電子郵件和密碼。我們還定義了一個僅包含用戶名和電子郵件的 Response 模型。輸入 Request 模型處理反序列化,而輸出 Response 模型處理對象序列化。然后通過 response_model 參數將響應模型傳遞給裝飾器。
現在,如果我們將請求本身作為響應返回,Pydantic 將省略 password ,因為我們定義的響應模型不包含密碼字段。
例如:
# output

? curl -X POST 'localhost:8000/login' \

    --header 'Content-Type: application/json' \

    --data-raw '{"username":"testdriven.io","email":"admin@testdriven.io","password":"testdriven.io"}'


{"username":"testdriven.io","email":"admin@testdriven.io"}中間件被用來在每個請求被視圖功能處理之前應用邏輯。
Flask
class middleware:

    def __init__(self, app) -> None:

        self.app = app


    def __call__(self, environ, start_response):

        start = time.time()

        response = self.app(environ, start_response)

        end = time.time() - start

        print(f"request processed in {end} s")

        return response


app = Flask(__name__)

app.wsgi_app = middleware(app.wsgi_app)
FastAPI
from fastapi import Request


@app.middleware("http")

async def add_process_time_header(request: Request, call_next):

    start_time = time.time()

    response = await call_next(request)

    process_time = time.time() - start_time

    print(f"request processed in {process_time} s")

return response@app.middleware("http")?裝飾器是在 FastAPI 中創建中間件的必備工具。上述中間件計算處理請求所花費的時間。視圖函數處理請求后,計算總處理時間并將其作為響應頭返回。
# flask output(logs)

request processed in 0.0010077953338623047 s

127.0.0.1 - - [22/Sep/2020 18:56:21] "GET / HTTP/1.1" 200 -


# fastapi output(logs)

request processed in 0.0009925365447998047 s

INFO: 127.0.0.1:51123 - "GET / HTTP/1.1" 200 OK隨著應用程序的發展,在某些時候你會想把類似的視圖、模板、靜態文件和模型組合在一起,以幫助把應用程序分解成更小的組件。
Flask
在 Flask 中,藍圖被用來實現模塊化:
# blueprints/product/views.py
from flask import Blueprint

product = Blueprint("product", __name__)

@product.route("/product1")
    ...
#?main.py
from?blueprints.product.views?import?product
app.register_blueprint(product)FastAPI
同時,在 FastAPI 中,模塊化是通過 APIRouter 實現的:
# routers/product/views.py

from fastapi import APIRouter


product = APIRouter()


@product.get("/product1")

    ...

# main.py


from routers.product.views import product


app.include_router(product)Flask
Flask 不會自動創建開箱即用的 API 文檔。然而,有幾個擴展可以處理這個問題,比如 flask-swagger 和 Flask RESTX,但它們需要額外的設置。
FastAPI
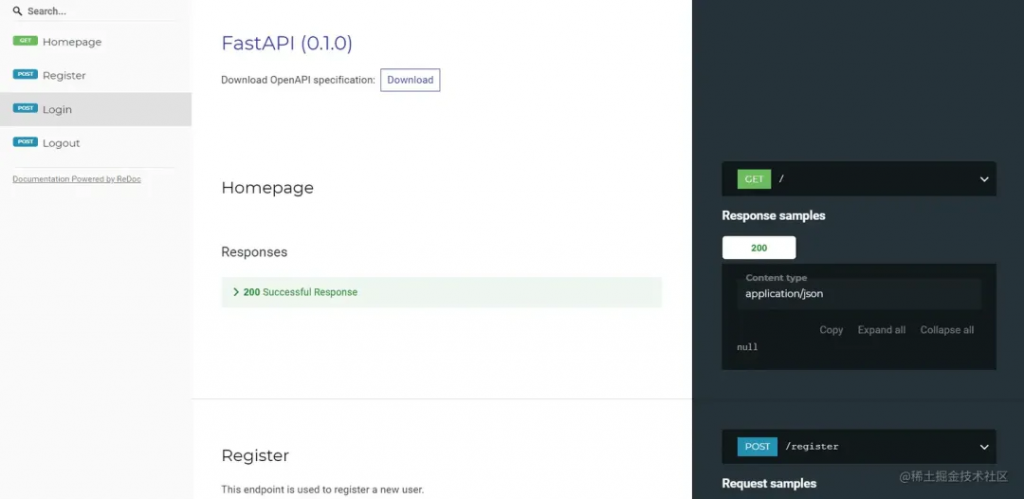
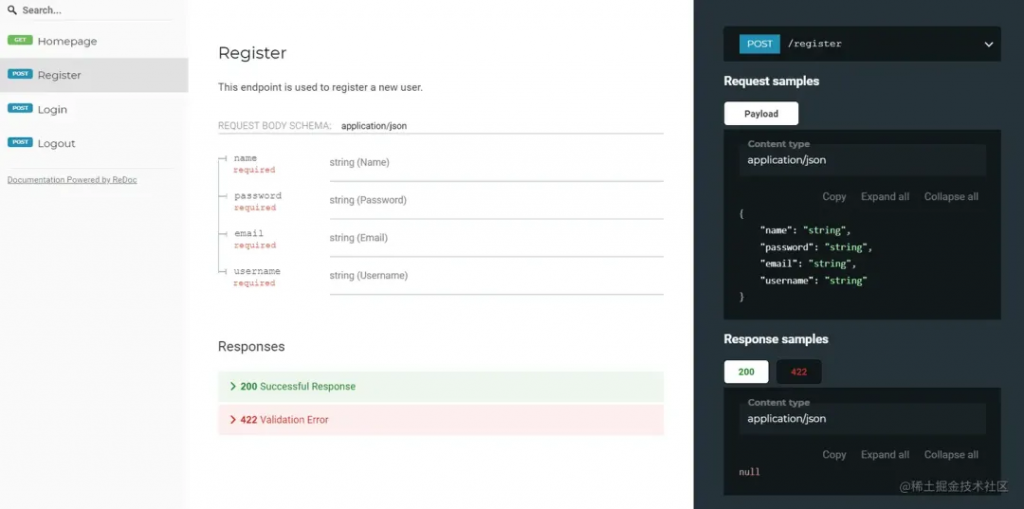
默認情況下,FastAPI 支持 OpenAPI 以及 Swagger UI 和 ReDoc。這意味著每個端點都自動從與端點關聯的元數據中記錄下來。

此處列出了所有已注冊的端點

替代文檔

Flask
Flask 有一個廣泛使用的第三方管理包,稱為 Flask-Admin,用于快速對您的模型執行 CRUD 操作。
FastAPI
截至目前,有兩個流行的 FastAPI 擴展用于此:
Flask
雖然 Flask 沒有原生解決方案,但可以使用多個第三方擴展。
FastAPI
FastAPI 通過?fastapi.security?包原生支持許多安全和身份驗證工具。通過幾行代碼,您可以將基本的 HTTP 身份驗證添加到您的應用程序中:
import secrets


from fastapi import Depends, FastAPI, HTTPException, status

from fastapi.security import HTTPBasic, HTTPBasicCredentials


app = FastAPI()


security = HTTPBasic()


def get_current_username(credentials: HTTPBasicCredentials = Depends(security)):

    correct_username = secrets.compare_digest(credentials.username, "stanleyjobson")

    correct_password = secrets.compare_digest(credentials.password, "swordfish")

    if not (correct_username and correct_password):

        raise HTTPException(status_code=status.HTTP_401_UNAUTHORIZED)

    return credentials.username


@app.get("/whoami")

def who_ami_i(username: str = Depends(get_current_username)):

    return {"username": username}
FastAPI 通過 OpenAPI 標準實現 OAuth2 和 OpenID Connect。
查看官方文檔中的以下資源以獲取更多信息:
其他資源
CORS(跨源資源共享)中間件檢查請求是否來自允許的來源。如果是,則將請求傳遞給下一個中間件或視圖函數。如果不是,它會拒絕請求,并將錯誤響應發送回調用者。
Flask?Flask 需要一個名為 Flask-CORS 的外部包來支持 CORS:
pip install flask-cors基本實現:
from flask_cors import CORS


app = Flask(__name__)


CORS(app)
FastAPI
FastAPI 原生支持 CORS:
from fastapi.middleware.cors import CORSMiddleware


app = FastAPI()


origins = ["*"]


app.add_middleware(CORSMiddleware, allow_origins=origins)Flask
import pytest

from flask import Flask


app = Flask(__name__)


@app.route("/")

def home():

    return {"message": "OK"}


def test_hello():

    res = app.test_client().get("/")


    assert res.status_code == 200

    assert res.data == b'{"message":"OK"}\n'
FastAPI
from fastapi import FastAPI

from fastapi.testclient import TestClient


app = FastAPI()


@app.get("/")

async def home():

    return {"message": "OK"}


client = TestClient(app)


def test_home():

    res = client.get("/")


    assert res.status_code == 200

    assert res.json() == {"message": "OK"}
FastAPI 提供了一個 TestClient。有了它,你可以直接用 FastAPI 運行 pytest。有關更多信息,請查看官方文檔中的測試指南。
Flask
Flask 默認運行開發 WSGI(Web 服務器網關接口)應用程序服務器。對于生產環境,您需要使用生產級 WSGI 應用服務器,例如 Gunicorn、uWSGI 或 mod_wsgi
安裝 Gunicorn:
pip install gunicorn啟動服務:
# main.py

# app = Flask(__name__)


gunicorn main:app
FastAPI
由于 FastAPI 沒有開發服務器,您將使用 Uvicorn(或 Daphne)進行開發和生產。
安裝 Uvicorn:
pip install uvicorn啟動服務:
python

# main.py

# app = FastAPI()


uvicorn main:app
您可能希望使用 Gunicorn 來管理 Uvicorn,以便同時利用并發性(通過 Uvicorn)和并行性(通過 Gunicorn worker):
# main.py

# app = FastAPI()


gunicorn -w 3 -k uvicorn.workers.UvicornWorker main:appFlask
FROM python3.10-slim


WORKDIR /app


COPY requirements.txt .


RUN pip install -r requirements.txt


COPY . .


EXPOSE 5000


CMD ["gunicorn", "main:app"]
這是 Flask 最簡單的 Dockerfile 之一。要了解如何針對生產對其進行全面配置,請查看使用 Postgres、Gunicorn 和 Nginx 教程對 Flask 進行 Docker 化。
FastAPI
sql

FROM python3.10-slim


WORKDIR /app


COPY requirements.txt .


RUN pip install -r requirements.txt


COPY . .


EXPOSE 8000


CMD ["uvicorn", "main:app"]
同樣,這是一個非常簡單的配置。 FastAPI 作者提供了幾個生產就緒的 Dockerfile。有關更多信息,請查看官方 FastAPI 文檔以及 Dockerizing FastAPI with Postgres、Uvicorn 和 Traefik 教程。
退一步講,Django 和 Flask 是兩個最流行的基于 Python 的網絡框架(FastAPI 是第三大流行框架)。不過它們(Django 和 Flask)的理念非常不同。Flask 比 Django 的優勢在于 Flask 是一個微框架。程序結構由程序員自己決定,不強制執行。開發者可以在他們認為合適的時候添加第三方擴展來改進他們的代碼。也就是說,通常情況下,隨著代碼庫的增長,需要一些幾乎所有網絡應用都需要的通用功能。這些功能與框架的緊密結合,使得終端開發者需要自己創建和維護的代碼大大減少。
本文中的代碼實例也表達了同樣的意思。換句話說,FastAPI 包括許多必要的功能。它還遵循嚴格的標準,使你的代碼可以生產并更容易維護。FastAPI 的文檔也非常完善。
雖然 FastAPI 可能不像 Flask 那樣久經考驗,但越來越多的開發人員正在轉向它來提供機器學習模型或開發 RESTful API。切換到 FastAPI 是一個不錯的選擇。
文章轉自微信公眾號@Python見習室

node.js + express + docker + mysql + jwt 實現用戶管理restful api

nodejs + mongodb 編寫 restful 風格博客 api

表格插件wpDataTables-將 WordPress 表與 Google Sheets API 連接

手把手教你用Python和Flask創建REST API

使用 Django 和 Django REST 框架構建 RESTful API:實現 CRUD 操作

ASP.NET Web API快速入門介紹

2024年在線市場平臺的11大最佳支付解決方案

完整指南:如何在應用程序中集成和使用ChatGPT API

選擇AI API的指南:ChatGPT、Gemini或Claude,哪一個最適合你?