
掌握ChatGPT插件與自定義GPT
REST API?是遵循根據?API 的 REST 結構構建內容的 API。REST 代表 “Representational State Transfer”。它由開發人員在創建 API 時遵循的各種規則組成。
REST API 的結構方式取決于它所針對的產品 ,但必須遵守 REST 的規則。
下面的示例響應來自 Github Open API。在本教程的后面部分,我們將使用此 API 構建 React 應用程序。
{

"login": "hacktivist123",

"id": 26572907,

"node_id": "MDQ6VXNlcjI2NTcyOTA3",

"avatar_url": "https://avatars3.githubusercontent.com/u/26572907?v=4",

"gravatar_id": "",

"url": "https://api.github.com/users/hacktivist123",

"html_url": "https://github.com/hacktivist123",

"followers_url": "https://api.github.com/users/hacktivist123/followers",

"following_url": "https://api.github.com/users/hacktivist123/following{/other_user}",

"gists_url": "https://api.github.com/users/hacktivist123/gists{/gist_id}",

"starred_url": "https://api.github.com/users/hacktivist123/starred{/owner}{/repo}",

"subscriptions_url": "https://api.github.com/users/hacktivist123/subscriptions",

"organizations_url": "https://api.github.com/users/hacktivist123/orgs",

"repos_url": "https://api.github.com/users/hacktivist123/repos",

"events_url": "https://api.github.com/users/hacktivist123/events{/privacy}",

"received_events_url": "https://api.github.com/users/hacktivist123/received_events",

"type": "User",

"site_admin": false,

"name": "Shedrack akintayo",

"company": null,

"blog": "https://sheddy.xyz",

"location": "Lagos, Nigeria ",

"email": null,

"hireable": true,

"bio": "? Software Engineer | | Developer Advocate??|| ? Everything JavaScript",

"public_repos": 68,

"public_gists": 1,

"followers": 130,

"following": 246,

"created_at": "2017-03-21T12:55:48Z",

"updated_at": "2020-05-11T13:02:57Z"

}
當我向以下端點發出請求時,上面的響應來自 Github REST API。它返回有關名為 hacktivist123 的用戶的所有存儲數據。有了這個響應,我們可以決定如何在 React 應用程序中展示這些信息。
API 是一種內置的 JavaScript 方法,用于從服務器或 API 端點獲取資源。它類似于fetch()XMLHttpRequest,但 fetch API 提供了更強大、更靈活的功能集。
它定義了 CORS 和 HTTP Origin 標頭語義等概念,并在其他位置取代了它們的單獨定義。
API 方法始終采用強制參數,即要獲取資源的路徑或URL。它返回一個Promise對象,無論請求是否成功,這個Promise都會包含請求的響應。您還可以選擇將 init options 對象作為第二個參數傳入。
獲取響應后,可以使用幾種內置方法來定義響應正文的內容及其處理方式。
Fetch API 與 jQuery Ajax 的主要區別在于三個方面,它們是:
fetch()將不允許使用跨站點 Cookie,即您不能使用fetch()。fetch()默認情況下也不會發送 Cookie,除非您在 init 中設置了credentials選項。resourceinitmethodheadersbodymodecredentials一個基本的 fetch 請求寫起來真的很簡單,看看下面的代碼:
fetch('https://api.github.com/users/hacktivist123/repos')

  .then(response => response.json())

  .then(data => console.log(data));
在上面的代碼中,我們從以 JSON 格式返回數據的 URL 獲取數據,然后將其打印到控制臺。使用 fetch() 的最簡單形式通常只接受一個參數,即你要獲取的資源的路徑,然后返回一個包含 fetch 請求響應的 promise。此響應是一個對象。
響應只是常規 HTTP 響應,而不是實際的 JSON。為了從響應中獲取 JSON 正文內容,我們必須在響應上使用 json() 方法將響應更改為實際的 JSON。
在 React Apps 中使用 Fetch API 是我們通常在 javascript 中使用 Fetch API 的方式,語法沒有變化,唯一的問題是決定在我們的 React 應用程序中的哪個位置發出 fetch 請求。大多數 fetch 請求或任何形式的 HTTP 請求通常是在 React 組件中完成的。
如果您的組件是 Class Component,則可以在 Lifecycle Method 中發出此請求,如果你的組件是一個 Functional Component,可以在React Hook中發起 。
例如,在下面的代碼中,我們將在類組件中發出 fetch 請求,這意味著我們必須在生命周期方法中執行此操作。在這種特殊情況下,我們的 fetch 請求將在生命周期方法中發出,因為我們想在 React 組件掛載后立即發出請求。componentDidMount
好的,以下是調整后的句子:
例如,在下面的代碼中,我們將在類組件中發出 fetch 請求。這意味著我們必須在生命周期方法中執行此操作。在這種情況下,我們的 fetch 請求將在生命周期方法 componentDidMount 中發出,因為我們想在 React 組件掛載后立即發出請求。
import React from 'react';


class myComponent extends React.Component {

  componentDidMount() {

    const apiUrl = 'https://api.github.com/users/hacktivist123/repos';

    fetch(apiUrl)

      .then((response) => response.json())

      .then((data) => console.log('This is your data', data));

  }

  render() {

    return <h1>my Component has Mounted, Check the browser 'console' </h1>;

  }

}

export default myComponent;
在上面的代碼中,我們正在創建一個非常簡單的類組件,該組件發出一個 fetch 請求,在 React 組件完成掛載后,將我們對 API URL 發出的 fetch 請求的最終數據記錄到瀏覽器控制臺中。
該方法可以獲取我們想要獲取的資源的路徑,該路徑被分配給一個名為 fetch 請求。當請求完成后,它將返回一個包含 response 對象的 Promise。然后,我們使用該方法從響應中提取 JSON 正文內容,最后我們將 Promise 的最終數據記錄到控制臺中。
在本節中,我們將構建一個使用外部 API 的簡單 react 應用程序,我們將使用 Fetch 方法來使用 API。
這個簡單的應用程序將顯示屬于特定用戶的所有存儲庫及其描述。在本教程中,我將使用我的 GitHub 用戶名,如果您愿意,您也可以使用您的用戶名。
我們需要做的第一件事是使用create-react-app生成我們的React應用。
npx create-react-app myRepos上面的命令將為我們引導一個新的 React 應用程序。創建新應用程序后,剩下要做的就是運行以下命令并開始編碼:
npm start如果我們的 React 創建正確,我們應該在運行上述命令后導航到瀏覽器窗口時看到localhost:3000。

在您的文件夾中,創建一個名為srccomponent的新文件夾。這個文件夾將保存我們所有的 React 組件。在新文件夾中,創建兩個名為 List.js 和 withListLoading.js 的文件。這兩個文件將保存我們的應用程序中需要的組件。
List.js 文件將以列表的形式處理 Repositories 的顯示,而 withListLoading.js 文件將包含一個高階組件,該組件將在我們將要發出的 Fetch 請求仍在進行時顯示。
在我們List.js文件夾內創建的文件中,讓我們粘貼以下代碼:
import React from 'react';

const List = (props) => {

  const { repos } = props;

  if (!repos || repos.length === 0) return <p>No repos, sorry</p>;

  return (

    <ul>

      <h2 className='list-head'>Available Public Repositories</h2>

      {repos.map((repo) => {

        return (

          <li key={repo.id} className='list'>

            <span className='repo-text'>{repo.name} </span>

            <span className='repo-description'>{repo.description}</span>

          </li>

        );

      })}

    </ul>

  );

};

export default List;
上面的代碼是一個基本的 React 列表組件,它將在列表中顯示數據,在本例中為存儲庫名稱及其描述。
現在,讓我一點一點地解釋代碼。
const { repos } = props;我們正在為名為 repos 的組件初始化一個 prop。
if (repos.length === 0 || !repos) return <p>No repos, sorry</p>;在這里,我們所做的只是制作一個條件語句,當我們從發出的請求中獲得的存儲庫長度等于零時,該語句將呈現一條消息。
return (

    <ul>

      <h2 className='list-head'>Available Public Repositories</h2>

      {repos.map((repo) => {

        return (

          <li key={repo.id} className='list'>

            <span className='repo-text'>{repo.name} </span>

            <span className='repo-description'>{repo.description}</span>

          </li>

        );

      })}

    </ul>

  );
在這里,我們將映射我們發出的 API 請求將提供的每個存儲庫,并提取每個存儲庫名稱及其描述,然后將每個存儲庫顯示在列表中。
export default List;在這里,我們導出了我們的組件,以便我們可以在其他地方使用它。
在我們 components 文件夾中創建的 withListLoading.js 文件中,讓我們粘貼以下代碼:
import React from 'react';
function WithListLoading(Component) {
return function WihLoadingComponent({ isLoading, ...props }) {
if (!isLoading) return <Component {...props} />;
return (
<p style={{ textAlign: 'center', fontSize: '30px' }}>
Hold on, fetching data may take some time :)
</p>
);
};
}
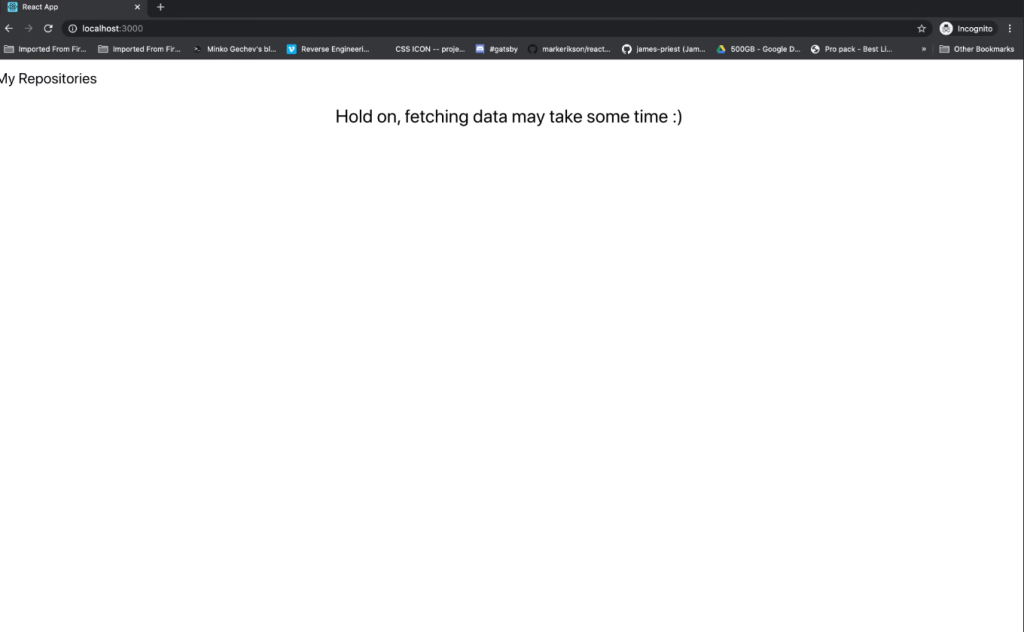
export default WithListLoading;上面的代碼是一個高階 React 組件,它接受另一個組件作為參數,并返回一個新的組件。在這個例子中,高階組件會等待檢查傳入的組件的狀態是否為 true。如果狀態為 true,它會顯示一條消息 “Hold on, fetching data may take some time :)”。然后,它將狀態更改為 false,并渲染傳入的組件(在這個例子中是 List 組件)。
在 src 文件夾內的 *App.js 文件中,讓我們粘貼以下代碼:
import React, { useEffect, useState } from 'react';

import './App.css';

import List from './components/List';

import withListLoading from './components/withListLoading';

function App() {

  const ListLoading = withListLoading(List);

  const [appState, setAppState] = useState({

    loading: false,

    repos: null,

  });


  useEffect(() => {

    setAppState({ loading: true });

    const apiUrl = https://api.github.com/users/hacktivist123/repos;
    fetch(apiUrl)
      .then((res) => res.json())
      .then((repos) => {
        setAppState({ loading: false, repos: repos });
      });
  }, [setAppState]);
  return (
    <div className='App'>
      <div className='container'>
        <h1>My Repositories</h1>
      </div>
      <div className='repo-container'>
        <ListLoading isLoading={appState.loading} repos={appState.repos} />
      </div>
      <footer>
        <div className='footer'>
          Built{' '}
          <span role='img' aria-label='love'>
            ??
          </span>{' '}
          with by Shedrack Akintayo
        </div>
      </footer>
    </div>
  );
}
export default App;
我們的 App.js 是一個功能組件,它使用 React Hooks 來處理狀態和副作用。如果你不熟悉 React Hooks,請閱讀我的 React Hooks 入門指南。
讓我一點一點地解釋上面的代碼。
import React, { useEffect, useState } from 'react';

import './App.css';

import List from './components/List';

import withListLoading from './components/withListLoading';
在這里,我們將導入所需的所有外部文件,以及我們在 components 文件夾中創建的組件。我們還從 React 中導入了我們需要的 React Hooks。
const ListLoading = withListLoading(List);

  const [appState, setAppState] = useState({

    loading: false,

    repos: null,

  });
在這里,我們正在創建一個名為 ListLoading 的新組件,并分配我們的高階組件。然后,我們創建了一個名為 loading 的狀態值,并使用 React Hook useState() 來管理它。最后,我們將這個狀態值傳遞給我們的高階組件,以便在列表加載時顯示相應的消息。
useEffect(() => {

    setAppState({ loading: true });

    const user = https://api.github.com/users/hacktivist123/repos;
    fetch(user)
      .then((res) => res.json())
      .then((repos) => {
        setAppState({ loading: false, repos: repos });
      });
  }, [setAppState]);
在這個 React Hook 中,我們首先將初始加載狀態設為 true。當這個狀態為 true 時,我們的高階組件會顯示一條消息。接著,我們創建一個名為 NAME 的常量變量,并將其設置為我們將從中獲取存儲庫數據的 API URL。然后,我們使用 useEffect() 鉤子來處理副作用。
然后,我們像上面討論的那樣發出一個基本請求,然后在請求完成后,我們將應用程序加載狀態設置為 false,并使用我們從請求中獲得的數據填充存儲庫狀態。
return (

    <div className='App'>

      <div className='container'>

        <h1>My Repositories</h1>

      </div>

      <div className='repo-container'>

        <ListLoading isLoading={AppState.loading} repos={AppState.repos} />

      </div>

    </div>

  );

}

export default App;
在這個示例中,我們渲染了一個高階組件(HOC),它接收一個組件作為參數并返回一個新的組件。這個新的組件會使用傳入的組件的 state 值來填充 prop 和 prop。同時,isLoadingrepos 這個 prop 用于指示數據是否正在加載。由于我們使用了 withListLoading HOC,所以在 fetch 請求仍在發出時,瀏覽器將顯示相應的加載狀態。
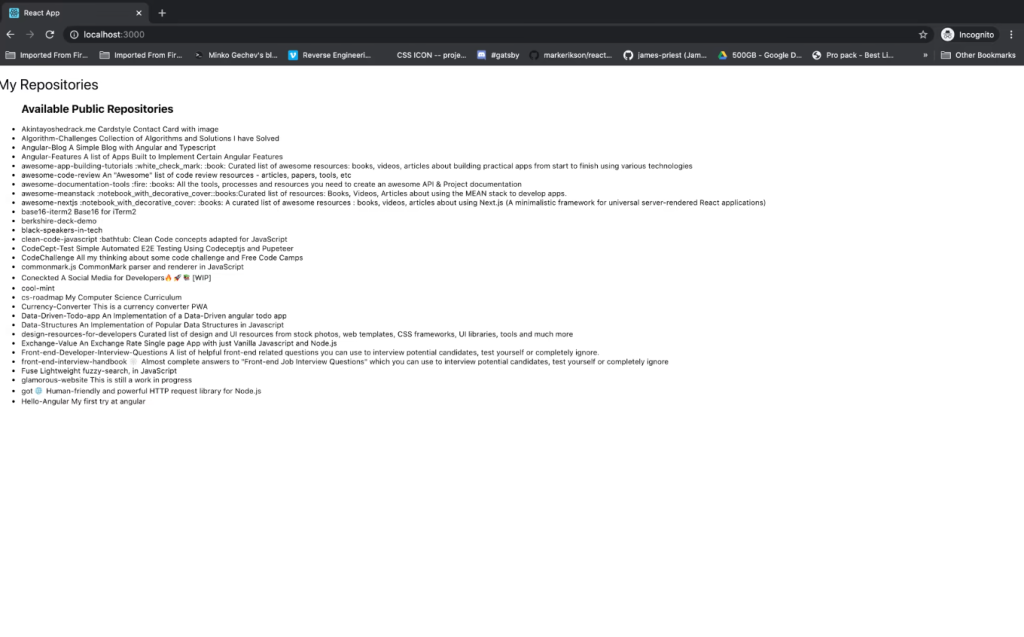
現在,當 fetch 請求成功完成時,我們應該會看到倉庫以列表格式顯示,如下所示:
現在,讓我們稍微設置一下項目的樣式,在您的 App.css 文件中,復制并粘貼此代碼。
@import url('https://fonts.googleapis.com/css2?family=Amiri&display=swap');

:root {

  --basic-color: #23cc71;

}

.App {

  box-sizing: border-box;

  display: flex;

  justify-content: center;

  align-items: center;

  flex-direction: column;

  font-family: 'Amiri', serif;

  overflow: hidden;

}

.container {

  display: flex;

  flex-direction: row;

}

.container h1 {

  font-size: 60px;

  text-align: center;

  color: var(--basic-color);

}

.repo-container {

  width: 50%;

  height: 700px;

  margin: 50px;

  box-shadow: 0 2px 10px rgba(0, 0, 0, 0.3);

  overflow: scroll;

}

@media screen and (max-width: 600px) {

  .repo-container {

    width: 100%;

    margin: 0;

    box-shadow: none;

  }

}

.repo-text {

  font-weight: 600;

}

.repo-description {

  font-weight: 600;

  font-style: bold;

  color: var(--basic-color);

}

.list-head {

  text-align: center;

  font-weight: 800;

  text-transform: uppercase;

}

.footer {

  font-size: 15px;

  font-weight: 600;

}

.list {

  list-style: circle;

}
因此,在上面的代碼中,我們通過為App.js文件中的各個元素分配不同的類名來設置應用程序的樣式。這使得我們的應用程序看起來更加美觀。
修改后,我們的應用程序應如下所示:
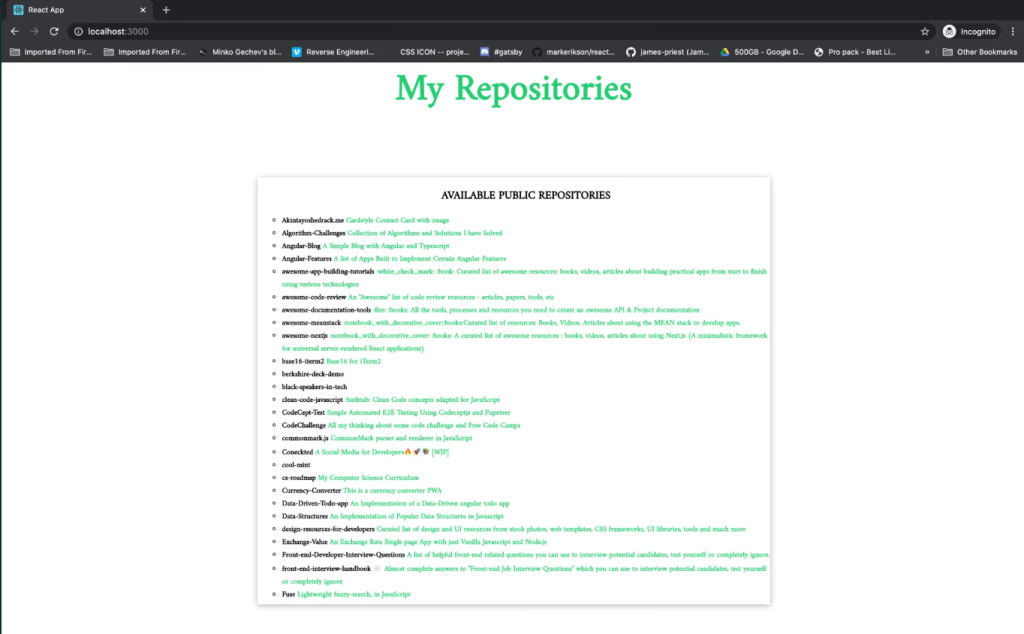
現在我們的應用程序看起來好多了。??
在這段代碼中,我們使用了 Fetch API 來調用 REST API。在下一節中,我們將探討如何使用 Axios 庫來實現相同的功能。
Axios 是一個易于使用的基于 Promise 的 HTTP 客戶端,適用于瀏覽器和 node.js。由于 Axios 是基于 promise 的,我們可以利用 async 和 await 來獲得更具可讀性和異步的代碼。使用 Axios,我們能夠攔截和取消請求,它還具有內置功能,可提供客戶端保護以防止跨站點請求偽造。
使用 Axios 發出 HTTP 請求非常簡單。下面的代碼基本上寫出了如何發出 HTTP 請求。
// Make a GET request

axios({

  method: 'get',

  url: 'https://api.github.com/users/hacktivist123',

});


// Make a Post Request

axios({

  method: 'post',

  url: '/login',

  data: {

    firstName: 'shedrack',

    lastName: 'akintayo'

  }

});
上面的代碼顯示了我們使用 Axios 發出 GET 和 POST HTTP 請求的基本方法。
Axios 還提供了一組用于執行不同 HTTP 請求的速記方法。方法如下:
axios.request(config)axios.get(url[, config])axios.delete(url[, config])axios.head(url[, config])axios.options(url[, config])axios.post(url[, data[, config]])axios.put(url[, data[, config]])axios.patch(url[, data[, config]])例如,如果我們想發出一個類似的請求,就像上面的示例代碼一樣,但使用簡寫方法,我們可以這樣做:
// Make a GET request with a shorthand method

axios.get('https://api.github.com/users/hacktivist123');


// Make a Post Request with a shorthand method

axios.post('/signup', {

    firstName: 'shedrack',

    lastName: 'akintayo'

});
在上面的代碼中,我們發出的請求與上面所做的相同,但這次使用簡寫方法。Axios 提供了靈活性,使您的 HTTP 請求更具可讀性。
Axios 允許開發人員同時發出并處理多個 HTTP 請求。它通過 axios.all() 方法接受一個參數數組,并返回一個 promise 對象,該對象在所有傳入的參數都解析完成后才會解析。
例如,我們可以使用以下方式向 GitHub API 發起多個請求:
axios.all([

  axios.get('https://api.github.com/users/hacktivist123'),

  axios.get('https://api.github.com/users/adenekan41')

])

.then(response => {

  console.log('Date created: ', response[0].data.created_at);

  console.log('Date created: ', response[1].data.created_at);

});
上面的代碼通過 axios.all() 方法并行地向參數數組發出多個請求,并返回響應數據。在我們的示例中,它會將每個 API 響應中的對象記錄到控制臺。
在本節中,我們將使用 Axios 替換現有 React 應用程序中的 fetch() 方法。首先,我們需要安裝 Axios,然后在 App.js 文件中使用它來向 GitHub API 發出 HTTP 請求。
現在讓我們通過運行以下任一命令在我們的 React 應用程序中安裝 Axios:
使用 NPM:
npm install axios使用 Yarn:
yarn add axios安裝完成后,我們必須將 axios 導入到我們的 App.js 中。在我們的 App.js 中,我們將以下行添加到 App.js 文件的頂部:
import axios from 'axios'添加代碼行后,在 App.js 文件中,我們可以使用 useEffect() 鉤子來處理副作用
useEffect(() => {

    setAppState({ loading: true });

    const apiUrl = 'https://api.github.com/users/hacktivist123/repos';

    axios.get(apiUrl).then((repos) => {

      const allRepos = repos.data;

      setAppState({ loading: false, repos: allRepos });

    });

  }, [setAppState]);
您可能已經注意到,我們現在已將 fetch API 替換為 Axios 速記方法,以向 API 發出請求。
axios.get(apiUrl).then((repos) => {

      const allRepos = repos.data;

      setAppState({ loading: false, repos: allRepos });

    });
在這個代碼塊中,我們發送一個 GET 請求以獲取數據,并返回一個 Promise。這個 Promise 包含名為 repos 的數據,我們將這些數據分配給一個常量變量。然后,我們將當前的加載狀態設置為 false,并將從請求中獲得的數據傳遞給名為 repos 的狀態變量。
如果我們正確地完成了所有操作,我們應該會看到我們的應用程序仍然以相同的方式呈現,沒有任何變化。
這就是我們如何使用 Axios 客戶端來使用 REST API的方法。
在本節中,我將探討 Fetch 和 Axios 對這些功能的支持程度。
Axios 和 fetch 都是很好的 API 使用方法,但在構建小型應用程序時,建議使用 fetch,而在構建大型應用程序時,出于可擴展性考慮,推薦使用 Axios。希望這個教程對你有所幫助,如果你有任何問題,可以在下面的評論部分提問,我會很高興回答每一個問題。
原文鏈接:https://www.smashingmagazine.com/2020/06/rest-api-react-fetch-axios/