
企業(yè)工商數(shù)據(jù)API用哪種?
新建config目錄,初始化并監(jiān)聽文件:
package config


import (

    "fmt"


    "github.com/fsnotify/fsnotify"

    "github.com/spf13/viper"

)


type Config struct {

    Name string

}


// 初始化配置

func Init(cfg string) error {

    c := Config{

        Name: cfg,

    }


    if err := c.initConfig(); err != nil {

        return err

    }


    c.watchConfig()


    return nil

}


func (c *Config) initConfig() error {

    if c.Name != "" {

        viper.SetConfigFile(c.Name)

    } else {

        // 默認(rèn)配置文件是conf/config.yaml

        viper.AddConfigPath("conf")

        viper.SetConfigName("config")

    }


    viper.SetConfigType("yaml")

    // viper解析配置文件

    err := viper.ReadInConfig()

    if err != nil {

        panic(fmt.Errorf("Fatal error config file: %s \n", err))

    }

    fmt.Println(viper.GetString("name"))


    return nil

}


func (c *Config) watchConfig() {

    viper.WatchConfig()

    viper.OnConfigChange(func(e fsnotify.Event) {

        fmt.Println("Config file changed:", e.Name)

    })

}
conf/config.yaml,語法可自行研究下,比較簡單。
YAML入門
code
name: gin-frame

db:

  name: blog

  host: 127.0.0.1:3306

  username: root

  password: 111111

charset: utf8mb4連接數(shù)據(jù)庫,構(gòu)建連接池:
go
package model


import (

    "fmt"

    "sync"

    "errors"


    orm "github.com/jinzhu/gorm"

    _ "github.com/jinzhu/gorm/dialects/mysql"

    "github.com/spf13/viper"

)


type MySqlPool struct {}


var instance *MySqlPool

var once sync.Once


var db *orm.DB

var err error


// 單例模式

func GetInstance() *MySqlPool {

    once.Do(func() {

        instance = &MySqlPool{}

    })


    return instance

}


func (pool *MySqlPool) InitPool() (isSuc bool) {

    dsn := fmt.Sprintf("%s:%s@tcp(%s)/%s?charset=%s", viper.GetString("db.username"), viper.GetString("db.password"), viper.GetString("db.host"), viper.GetString("db.name"), viper.GetString("db.charset"))

    db, err = orm.Open("mysql", dsn)

    if err != nil {

        panic(errors.New("mysql連接失敗"))

        return false

    }


    // 連接數(shù)配置也可以寫入配置,在此讀取

    db.DB().SetMaxIdleConns(50)

    db.DB().SetMaxOpenConns(50)

    // db.LogMode(true)

    return true

}我們完善一下main.go,初始化配置,并構(gòu)建連接池:
go
package main

// import 這里我習(xí)慣把官方庫,開源庫,本地module依次列出

import (

    "log"

    "os"

    "errors"


    "github.com/spf13/pflag"


    "local.com/sai0556/gin-frame/config"

    "local.com/sai0556/gin-frame/model"

)


var (

    conf = pflag.StringP("config", "c", "", "config filepath")

)


func main() {

    pflag.Parse()


    // 初始化配置

    if err := config.Init(*conf); err != nil {

        panic(err)

    }


    // 連接mysql數(shù)據(jù)庫

    isSuc := model.GetInstance().InitPool()

    if !isSuc {

        log.Println("init database pool failure...")

        panic(errors.New("init database pool failure"))

    }

}
寫完不妨運(yùn)行一下,看看效果吧!
code
go run main.go -c=./conf/config.yaml
在上篇里,我介紹了讀取配置,并嘗試連接了數(shù)據(jù)庫,那么這一篇呢,我們主要利用gin框架來寫寫簡單的接口。
為了便于管理,還是將路由文件單獨(dú)出來,新建routes:
go
package router
import (
"net/http"
"github.com/gin-gonic/gin"
"local.com/sai0556/gin-frame/controller"
)
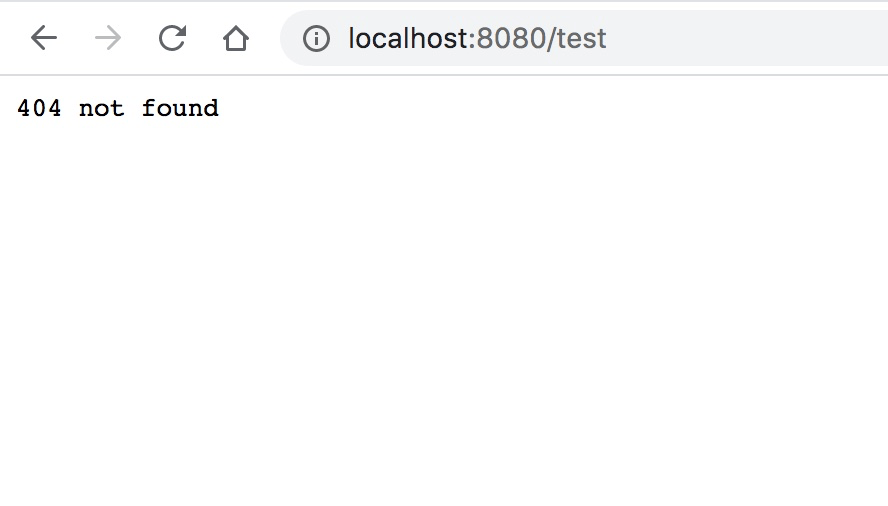
func Load(g *gin.Engine) *gin.Engine {
g.Use(gin.Recovery())
// 404
g.NoRoute(func (c *gin.Context) {
c.String(http.StatusNotFound, "404 not found");
})
g.GET("/", controller.Index)
return g
}上面的代碼中我們看到了controller,我們建一個(gè)目錄controller:
先建base.go文件,用于寫一些基礎(chǔ)的方法,如SendResponse返回json。
go
package controller


import (

    "net/http"


    "github.com/gin-gonic/gin"

)


type Response struct {

    Code int json:"code"
    Message string json:"message"
    Data interface{} json:"data"
}

func SendResponse(c *gin.Context, code int, message string, data interface{}) {
    c.JSON(http.StatusOK, Response{
        Code: code,
        Message: message,
        Data: data,
    })
}
再來寫個(gè)index.go,處理邏輯。
go
package controller


import (

    "github.com/gin-gonic/gin"

)


func Index(c *gin.Context) {

    SendResponse(c, 0, "success", nil)

}go
// main.go

// 在連接數(shù)據(jù)庫后加入以下代碼


gin.SetMode("debug")

g := gin.New()

g = router.Load(g)


g.Run(":8080")
不妨啟動看看效果。
go run main.go -c=./conf/config.yaml

當(dāng)然,這里的服務(wù)啟動、停止可以寫得再優(yōu)雅一些。
前兩篇我們已經(jīng)完成了gin+gorm部分,今天我們來補(bǔ)充go-Redis,并進(jìn)行測試。
我們把Redis相關(guān)也放在model下面,使用的是常見的go-redis:
go
// redis.go

package model


import (

    "fmt"


    "github.com/spf13/viper"

    "github.com/go-redis/redis"

)


var RedisClient *redis.Client


func RedisInit() {

    RedisClient = redis.NewClient(&redis.Options{

        Addr:     fmt.Sprintf("%s:%s", viper.GetString("redis.host"), viper.GetString("redis.port")),

        Password: viper.GetString("redis.auth"),

        DB:       0,

    })


    _, err := RedisClient.Ping().Result()

    if err != nil {

        panic("redis ping error")

    }

}
然后在連接Mysql的前面加入初始化redis連接的操作即可。
go
// redis 初始化

model.RedisInit()你可以做一些簡單操作,或者在redis.go做一些常用方法的封裝,比較簡單,就不贅述了,更多go-redis操作可見:
新建測試目錄test,建立三個(gè)文件:
// index.go

package test


import (

    "net/http"

    "io/ioutil"

)


func Sum(a int, b int) int {

    return a+b

}


func HttpIndex() []byte {

    resp, err := http.Get("http://127.0.0.1:8080/")

    if err != nil && resp.StatusCode != 200 {

        panic(err)

    }

    //關(guān)閉連接

    defer resp.Body.Close()

    //讀取報(bào)文中所有內(nèi)容

    body, err := ioutil.ReadAll(resp.Body)


    if err != nil {

        panic(err)

    }

    //輸出內(nèi)容

    return body
// index_test.go
package test
import (
"testing"
"encoding/json"
"local.com/sai0556/gin-frame/controller"
)
func TestSum(t *testing.T) {
ret := Sum(2, 7)
if ret != 9 {
t.Error("Expected 9 ~wow~")
}
}
func TestHttpIndex(t *testing.T) {
data := HttpIndex()
target := controller.Response{}
// json轉(zhuǎn)換
if err := json.Unmarshal(data, &target); err != nil {
t.Error(target)
}
ret := controller.Response{0, "success", nil}
if target != ret {
t.Error("json error")
}
}// index_bench_test.go
package test
import (
"testing"
)
func BenchmarkSum(b *testing.B) {
for i := 0; i < b.N; i++ {
Sum(2, 7)
}
}
func BenchmarkHttpIndex(b *testing.B) {
for i := 0; i < b.N; i++ {
HttpIndex()
}
}私以為go的測試相比其他語言還是比較簡潔的,這里需要注意幾點(diǎn):
運(yùn)行起來,看一下:
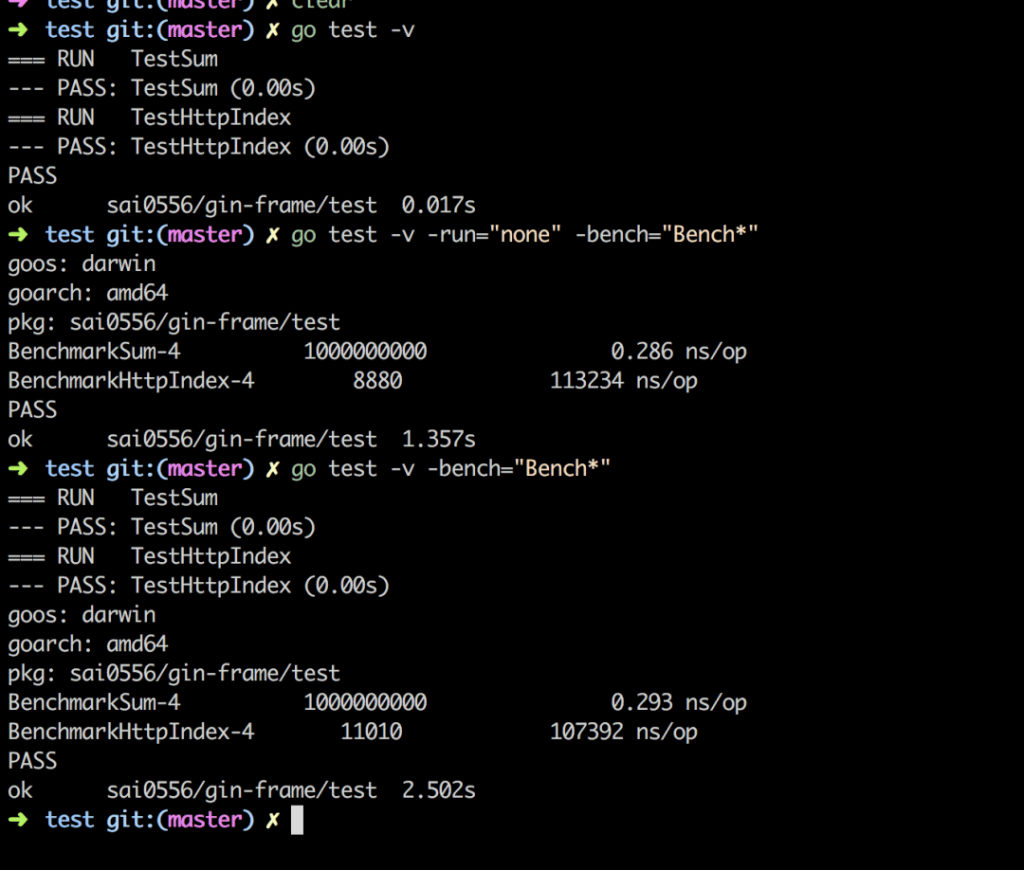
對圖中做一些說明:
code
// -run="none"不執(zhí)行基礎(chǔ)單元測試,bench指定基準(zhǔn)測試方法

go test -v -run="none" -bench="Bench*"


// 最后一個(gè)BenchmarkHttpIndex-4后面測試結(jié)果表示

一共執(zhí)行了11010次,每次執(zhí)行耗時(shí)107392ns(~0.107ms)
test標(biāo)準(zhǔn)庫
文章很基礎(chǔ),主要是介紹了結(jié)合了gin+gorm+go-redis,并寫了簡單的測試,是相對基礎(chǔ)的文章,但足以應(yīng)付一些api接口了。希望對你有幫助,有問題可留言或私信。
點(diǎn)擊查看項(xiàng)目DEMO
文章轉(zhuǎn)自微信公眾號@SaiWeng
企業(yè)工商數(shù)據(jù)API用哪種?

2024年創(chuàng)建社交媒體帖子的最佳圖像工具API

2024年小型企業(yè)的7個(gè)最佳短信應(yīng)用API

用gin寫簡單的crud后端API接口
鍵.png)
最新LangChain+GLM4開發(fā)AI應(yīng)用程序系列(一):快速入門篇

2024年您產(chǎn)品必備的10大AI API推薦
GraphRAG:基于PolarDB+通義千問api+LangChain的知識圖譜定制實(shí)踐

使用Node.js、Express和MySQL構(gòu)建REST API

天氣API推薦:精準(zhǔn)獲取氣象數(shù)據(jù)的首選